When people find out I like to cook and that I write a blog they always ask me what is my favorite thing to cook. And I’m super eloquent and say things like, “um..erm…well… I don’t really know.” Super helpful, right? But when I really think about it, my favorite thing to make is cookies. I love that it’s a bunch of ingredients, and many of them you wouldn’t eat as they are, like flour, eggs, and baking soda; but then all together those ingredients become something delicious. I like that there are fancy looking cookies and simple drop cookies. And don’t get me started on cookie cutters. I would amass an even larger collection if I had the space.
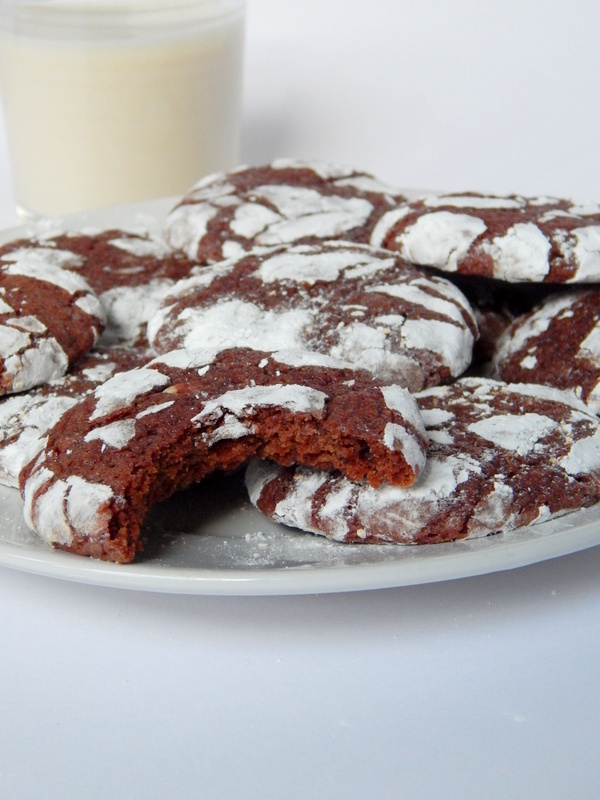
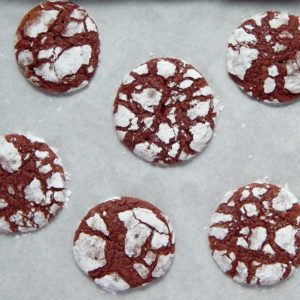
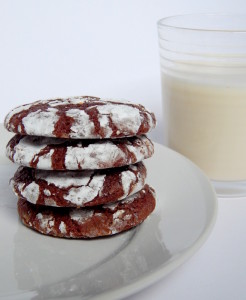
Today’s cookies I really like because they are simple to make and have a really cool crackle look. And the best part is you don’t have to do a lot of work to acheive it. Seriously. You let science and baking do the work for you. In the interest of full disclosure, these cookies were supposed to be red velvet, but as you can see from the pictures they are more brown than red. The cookies didn’t end up red because I followed the recipe too closely and ignored my better judgement. In general, recipes are helpful, but sometimes your eye can tell you something is wrong even if the paper is saying it should be fine. I think most of the time, listen to your eye. That’s a weird sentence, and I hope you know what I mean.
Here’s where I think I lost the red color: first, I bought fancy eggs and their yolks were the deepest, most golden orange I had ever seen. These are the eggs that Brooklyn hipsters, organic farmers, and pro-locavore movement books tell you about. I’m only sorry I didn’t take a picture of how gorgeous the eggs were. Anyway, the recipe called for mixing 1 1/2 teaspoons of food coloring into the egg mixture. I did, and it looked decidedly maroon. I thought the dark eggs may have led to a dark color. But, no matter, I was going to add the flour and lighten things up.
Only, that was a dumb thought because the white flour was mixed with brown cocoa powder, which only made the whole thing darker. Now I was panicked, because it was clear this wasn’t going to be brilliant red like the magazine picture. So I tried throwing on a little more food coloring, but by the time the flour is in the batter, the whole thing is getting thick, and it’s much harder to mix in a liquid. In the end, I think my cookies achieved the burgundy color that only seems to appear in a men’s dress shoe. Appetizing, I know, but I do think that color is nice and special in its own way.
Don’t let my color mistakes dissuade you, these cookies are worth it at any color. They are impossibly moist and cake-like in consistency. The were so delicious I ate three as I was taking pictures of them and then two I was done. If you can get them to be bright red, I think they would be an amazing Valentine’s Day treat.
Adapted, ever so slightly, from Food Network Magazine, December 2014.
 Messy level: Two spoons. Like most cookies, you need two bowls, some mixing utensils, and cookie sheets. You will need a third bowl for confectioner’s sugar so you can roll ball of dough in it. That’s the messy part because no matter how careful you are, you’re likely to inhale a confectioner’s sugar cloud.
- 2 oz white chocolate chips
- 1¼ cup all-purpose flour
- 2 tablespoons unsweetened cocoa powder
- 1 teaspoon baking powder
- ¼ teaspoon salt
- 2 large eggs
- 3 tablespoons vegetable oil
- red food coloring
- ¾ cup granulated sugar (in the UK I use caster sugar)
- 1 cup confectioner's sugar (you might not need this much)
- Put white chocolate in a small microwaveable bowl. Microwave for 30-second intervals, stirring in between, until smooth. This took me 60 seconds.
- In a medium bowl, whisk together the flour, cocoa powder, baking soda, and salt.
- In a large bowl, whisk together the eggs, vegetable oil, and food coloring. Start with 1½ teaspoons of food coloring and add more until you have the color you like.
- Whisk the white chocolate and sugar into the egg mixture until smooth.
- Stir the flour mixture into the egg mixture until it is smooth.
- Transfer the batter to a large square of plastic wrap. Wrap it all up and pat it into a rectangle. Make sure it is tightly wrapped, then put it in the refrigerator for 1 hour, or up until over night.
- Line a baking sheet with parchment paper. Preheat the oven to 300°F/150°C.
- Put the confectioner's sugar in a bowl. Start with ½ a cup, then add more as needed so you aren't wasting.
- Roll tablespoon size pieces of dough into a ball. Dip them in the confectioners sugar and coat completely.
- Flatten the balls slightly, then dip them in the confectioner's sugar again.
- Arrange the cookies 2 inches apart on your prepared sheet. Note: If you're going to bake 2 sheets at a time, swap the cookie sheets between top an bottom halfway through baking.
- Bake for 16-18 minutes, or until the cookies are puffed a bit and firm.
- Let cool, then stuff your face.

