 You might have noticed that the blog has gotten a new look! I’m enjoying it, and I hope you are too. I’ll be honest, there have been some kinks in getting it set up. For example, I accidentally sent my subscribers two emails with posts from 2014. Eek.
But overall, I think the new look is sleek, modern, and really highlights the photography. But, the photography, is why I put the redesign on hold for so long. Some of my old photos were too small, sideways, and worst of all terribly embarrassing. Terribly. Eventually, I got over the embarrassment and I noticed that my photos have gotten a heck of a lot better. I’ve still got a long way to go. Even in this post I can see things I want to change, however I’ve learned a lot. And I thought, maybe what I learned could be helpful to you too. So, I’ve put together a list of 5 food photography tips. Hope you find it useful!
1. Read Tasty Food Photography from Pinch of Yum.
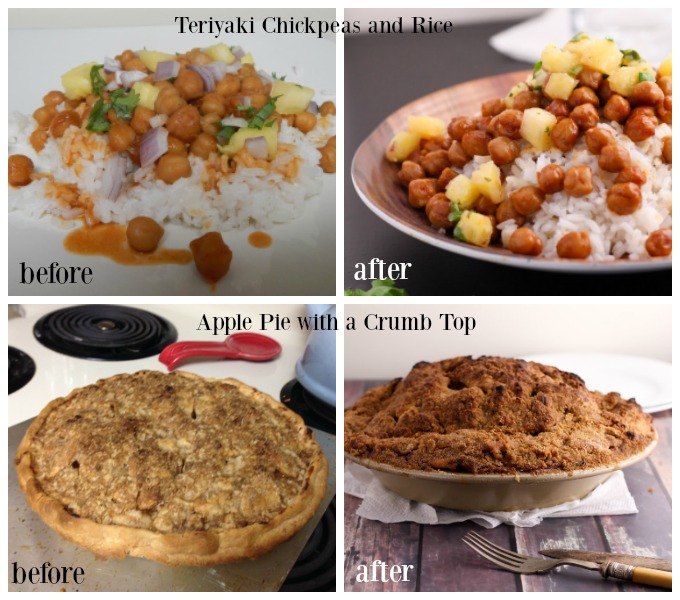
Ok a book may not sound like a tip, but I cannot recommend this book enough. This book taught me literally everything I know about food photography. Everything. I learned photography lingo, about different lighting, how to compose visually interesting images, and how to edit photos. Look at the photos below. You can see directly how much I’ve grown and it’s because of this book. This book is also full of simple yet transformative tips to help make foods look delicious.
For example, look at the teriyaki chickpea photos above. When I took that before photo I was so proud of the “artfully” messy drizzle of sauce. Today, it looks like a lump on a plate. In the after photo I wanted the food to look robust and appetizing, but I didn’t have enough rice to fill the bowl. So, using a Tasty Food Photography trick, I cut an onion in half then layered the rice, chickpeas, and salsa on top. This creates a full looking bowl and allows everything to stack nicely. It’s an easy trick that allows the dish to shine and look delicious – and the book if full of lots more useful advice.
2. The overhead lighting in your kitchen is not your friend.
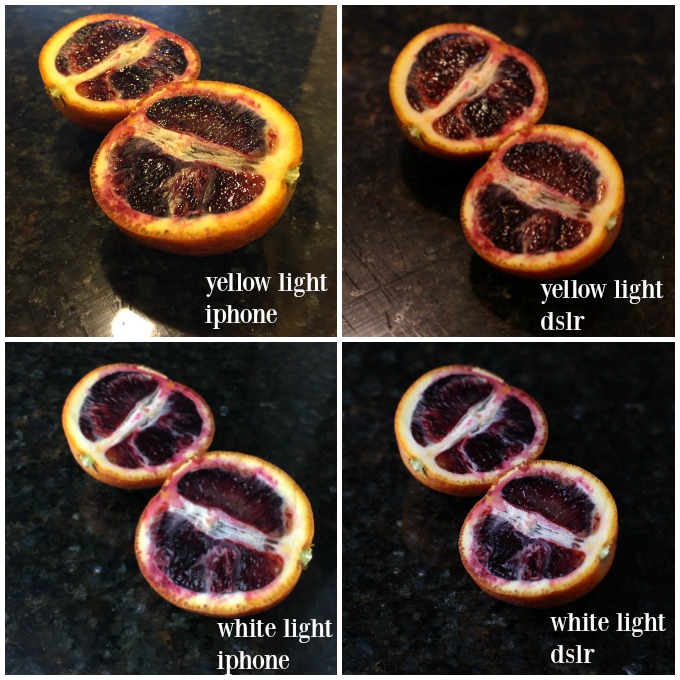
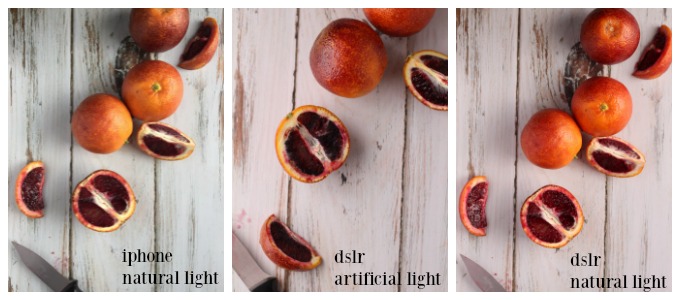
Pretty much all of my photos from 2014 and earlier were taken with my phone, in my kitchen, and using the overhead kitchen lights. That kind of lighting never looks good. Not ever. First, yellow lighting messes with the colors. Second, when you take overhead shots your phone/camera/body can create a shadow. Look at the blood oranges below. They are so gorgeous and rich in color – but the kitchen lights give a weird color to the skin, the flesh is too shiny, and there’s a bright glare on the counter.
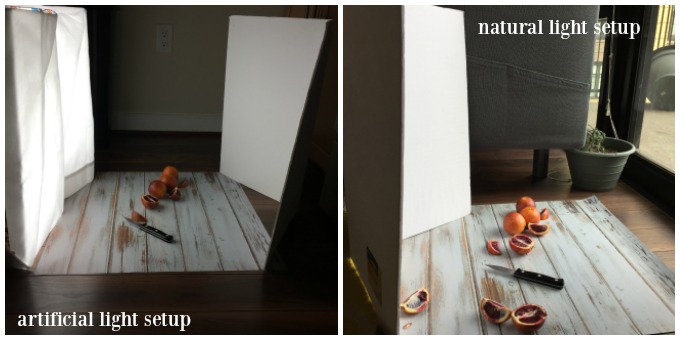
So, if not kitchen lighting what do you use? Well first there’s natural light. Set up by a window and you’ll have lovely light. You can see below, when I use natural lighting I set up on the floor near a window and use a piece of foam board to bounce the light. Simple and low budget.
However, if you have a job or the weather is bad, natural lighting isn’t always an option. Instead you can use artificial lights with white light bulbs. I do have dreams of one day buying the Lowel EGO Digital Imaging Tabletop Light, but it’s not cheap. Instead I built my own lights using this tutorial from the Su Chef. Most of the photos on my blog are shot using this lamp, including the blood oranges in the photos above.
Natural or artificial, whatever you choose stay away from the yellow lighting!
3. Pay attention to how you arrange your food.
Composition matters. Check out the photo above of the blood orange in the white light. It does have a bit of a chiaroscuro appeal – but still there’s a lot to be desired. It doesn’t look as bright, and tropical, and juicy as those oranges really are. I think the point of food photography is to show off how delicious the food is, and composition helps make it happen.
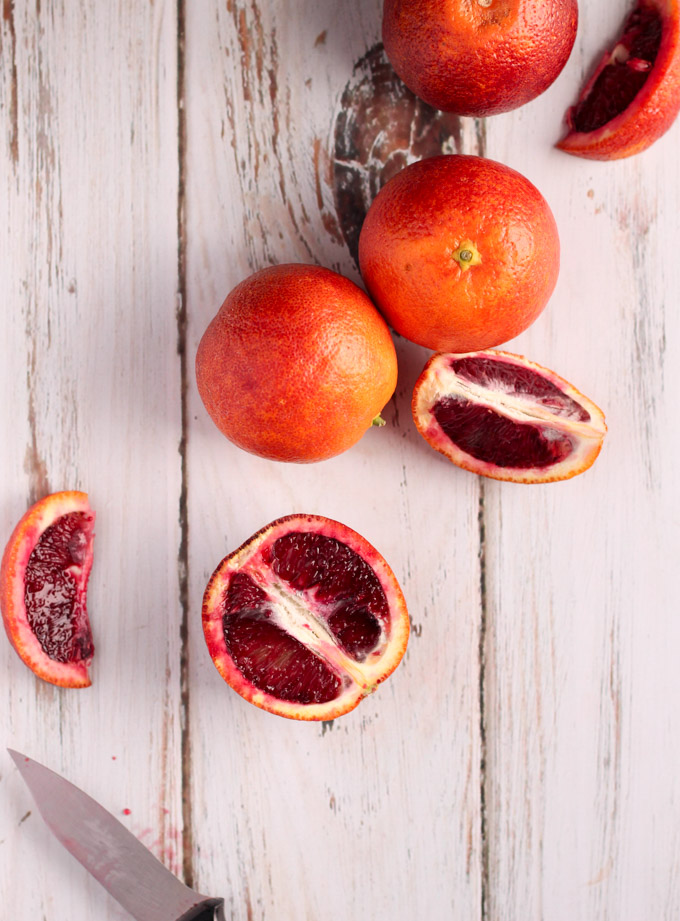
I used to think that good food photography required lots of props. You know, special plates, backgrounds, and tea towels. Yeah, today I have some of those things, but you don’t need them. All you have to do is make thoughtful choices. I think blood oranges are beautiful. With a photo, I wanted to highlight the dark color on the inside, the ruby blush of red on the skin, and the juiciness of the fruit.
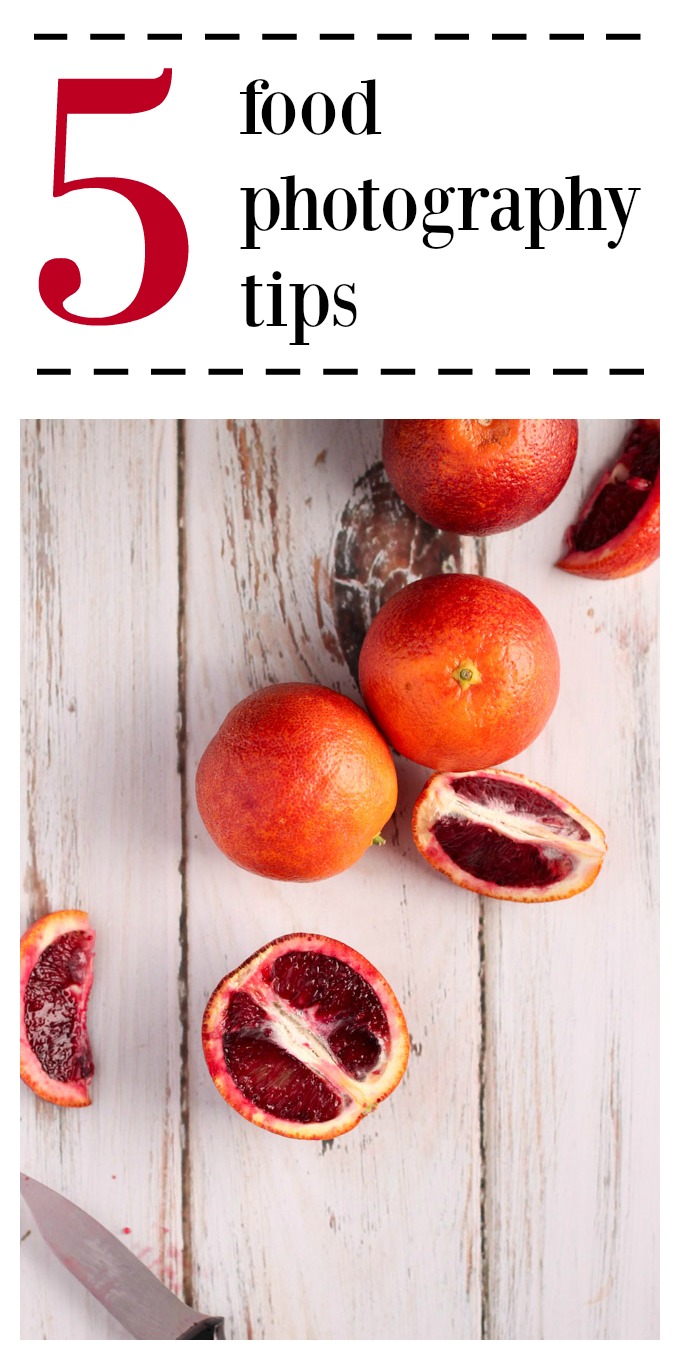
To showcase all facets, I decided to take an overhead shot. I also included a knife (the only real prop in the photo), and then I let some juice splatter on the background. The oranges are cut to show interesting shape and texture and I arranged everything diagonal from bottom left to top right. I made these choices to create some visual interest and that way it wouldn’t be just some blood orange plopped on the counter. [Side note: the background is a vinyl backdrop purchased from Swanky Prints. I like it a lot, but I also use my kitchen table, kitchen counter, and the hardwood floors. Use what you got!]
Also, what’s not in the photo is as important was what is. Look back at my before apple pie post. You can see my spoon rest, tea kettle, and burners. None of that has anything to do with pie. It’s distracting, and being thoughtful makes loads of difference.
4. Edit your photos!
Editing photos helps make the food look delicious. It’s not about making things look false, it’s about making things look delicious. It’s about making people want to eat the food you cook. The truth is sometimes cameras don’t capture things like your eyes do, so a photo might need to be brighter, colors richer, and shadows lighter.
Or sometimes, like in the case of these oranges, the photo needs straightening. Check out the unedited dslr photos above and then the edited version below. Editing made the wood grain vertical and not diagonal. Simple but helpful.
I used to be worried editing software would be expensive but it’s not. On my phone I like Snapseed which is free. There’s also VSCO (free), Enlight ($3.99), and PS Express (free). For the computer I use Adobe Creative Cloud, which has Lightroom and Photoshop for $9.99 per month. Editing is within everyone’s prize range.
Also, editing is fun. Filters and edits allow you to create different styles – bright, dusty, dark, moody. Go wild.
5. Equipment does, and does not, matter.
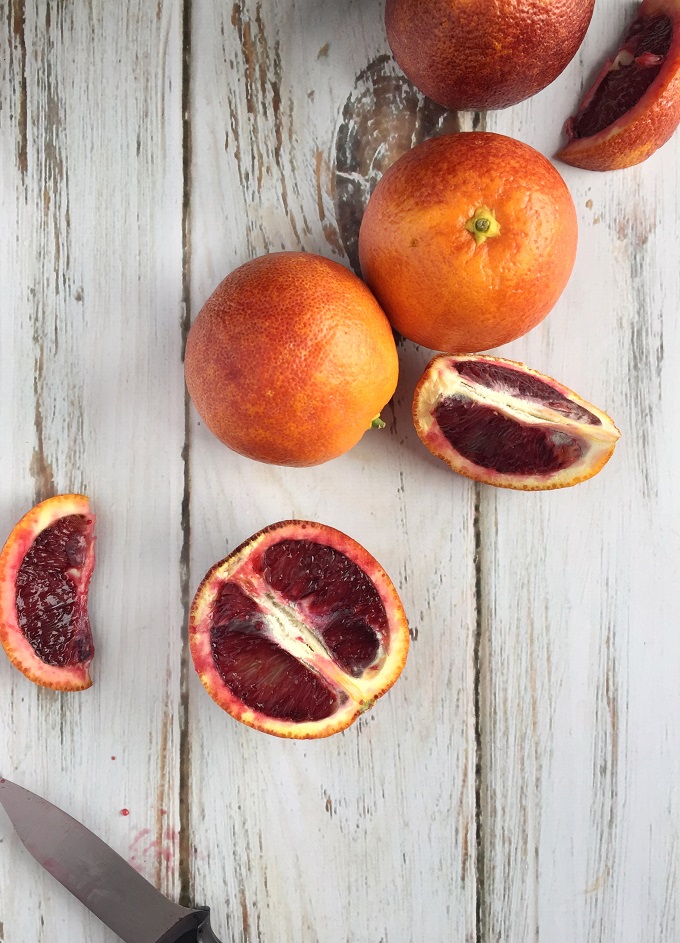
As I’ve gotten more into photography, I’ve spent more money on equipment. However, you don’t need a dslr, lots of lens, and tons of props to end up with great photos. My first four tips should already show you that. I’ve built my own lights using foam board, I bought backgrounds for about $30, and it’s possible to take great photos using an iphone. The photo below was taken with an iphone, and it’s sort of rustic and pretty, and I like it.
And you can take great photos with little gear too. For me, the bottom line is with care and attention you can take great photos using whatever type of camera you have. Learn, get creative, try some things, and have fun.
So those are my tips. I hope you find them helpful – and at the very least I hope you enjoy the ridiculous before and after photos at the top of this post. They’re hilarious. If you have tips or questions, please share them in the comments below.
[Note: Some, but not all, of the links in this post are affiliate links. That means if you make a purchase I will receive a portion of the sale. Thank you for your support!]




Hi Mariel,
I’m Randy, your friend Anna’s dad. I farm and sell online, so I’m always taking pics of food. I think about each shot, but had forgotten until seeing your post my original intention of building a light box where things actually come out right, without my or my phone’s shadow. Thanks for taking the time to share this!
Randy
Star Hollow Farm
Glad you find it helpful. In London I built myself one light box but when I moved back to the states I loved it so much I decided to make two. It’s really great and a big help!
This was very interesting!! It had me thinking about all the mistakes I make…..
I completely hear you on mistakes! I look at old photos and think what was I doing?! But we always have the chance to improve and try again. 🙂