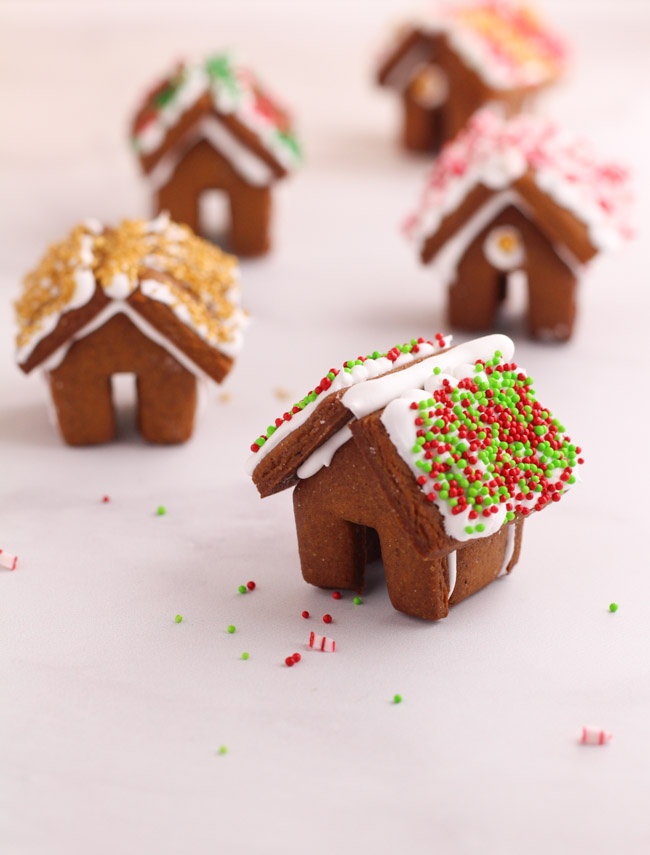
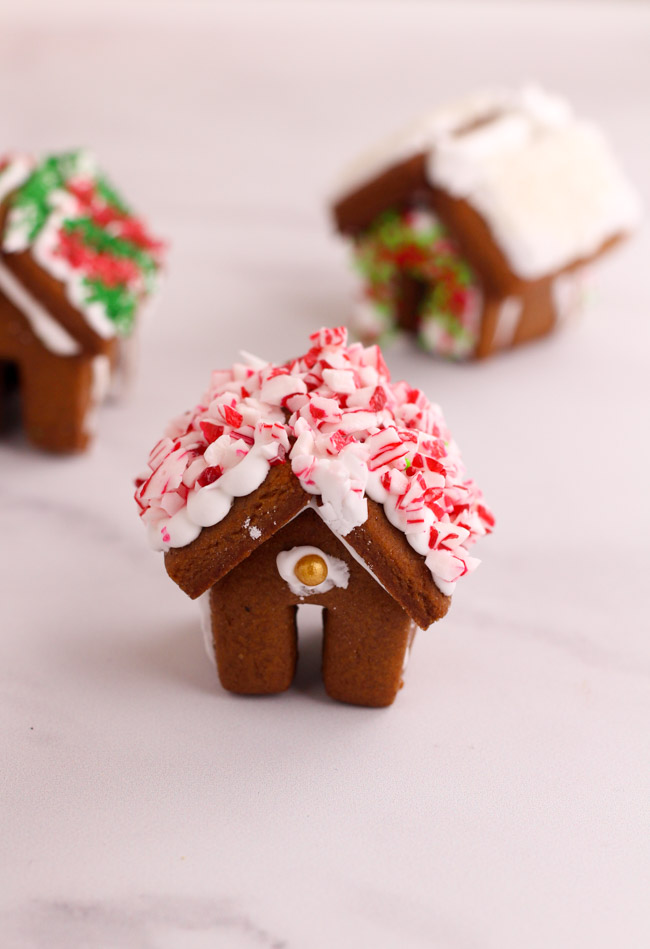
This weekend I’m having a cookie baking weekend with two of my friends. I am so excited! Cookies are my favorite thing to bake throughout the year – and in December it’s my favorite holiday tradition. My friends and I have a long list of cookies we’re going to make tomorrow including this recipe for gingerbread. While this recipe can be used to make any gingerbread shapes you’d like, today we’re focusing on super adorable mini gingerbread house cookies.
I got into mini gingerbread house cookies in part because they are charmingly cute. I also got excited about them because two years ago I attempted a full sized gingerbread house and was disappointed with the end result. Disappointed is a mild word for what I felt. I thought my end result look like an abandoned Christmas house that now people would use on a Halloween haunted forest tour.
I was not proud of that house. And anyway, it collapsed almost immediately. Somehow I thought tiny houses would be easier to get right. And for me, they totally were! Their size makes them cute regardless of design. Plus I figured smaller size could mean easier to stand up. It also means more opportunities to get it right!
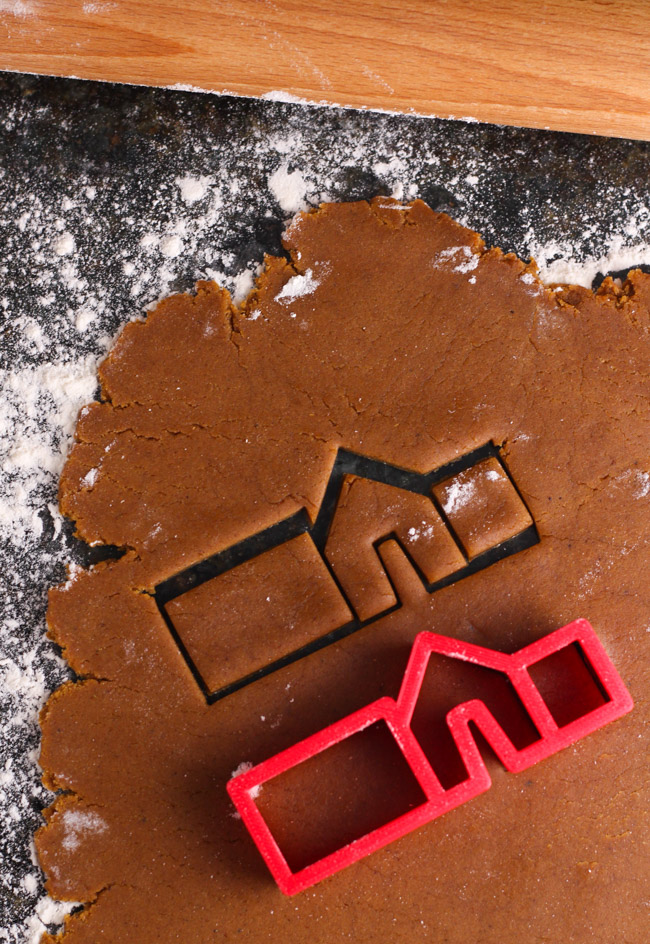
So, I bought this mini gingerbread house cookie cutter and got excited about some holiday baking. If you’re not so sure about buying a cutter you can find a gingerbread house template here. I like the cutter a lot because it’s so easy and quick to use. Two presses of it makes a house and then you put them on your sheet to bake.
I have two more reasons for loving these houses. One, is that I’m not good at precision decorations. I grew up simply throwing lots of sprinkles on sugar cookies and baking them. I am not great with a piping bag and making little swirls and dots and who knows what else.
While I’ve seen some beautiful tiny houses on Pinterest, I also stand by my belief that these houses don’t need a lot of fanfare. They are adorable as they are. My stance: buy lots of beautiful sprinkles, ice these houses wildly, and throw sprinkles on the icing. Job done. They’ll be amazing.
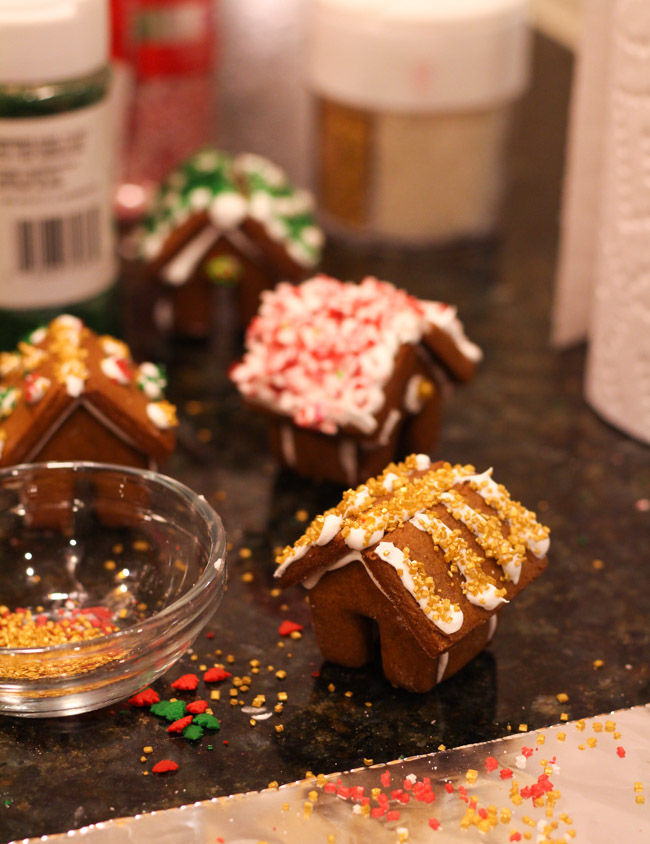 It does however, make for a pretty big mess. I decided to snap a quick photo in the yellow lights of my kitchen, and you can see it above. It doesn’t fully capture the amount of sprinkles on the counter, but it gives you an idea. Just multiply what you see by 100.
Anyway, my decorating plan of attack was this: 1. Put a piece of aluminum foil on the counter 2. Place all the roofs on the foil. 3. Ice the roofs and decorate wildly 4. Let them dry. 5. Assemble the houses 6. crumble up the foil and throw it away. 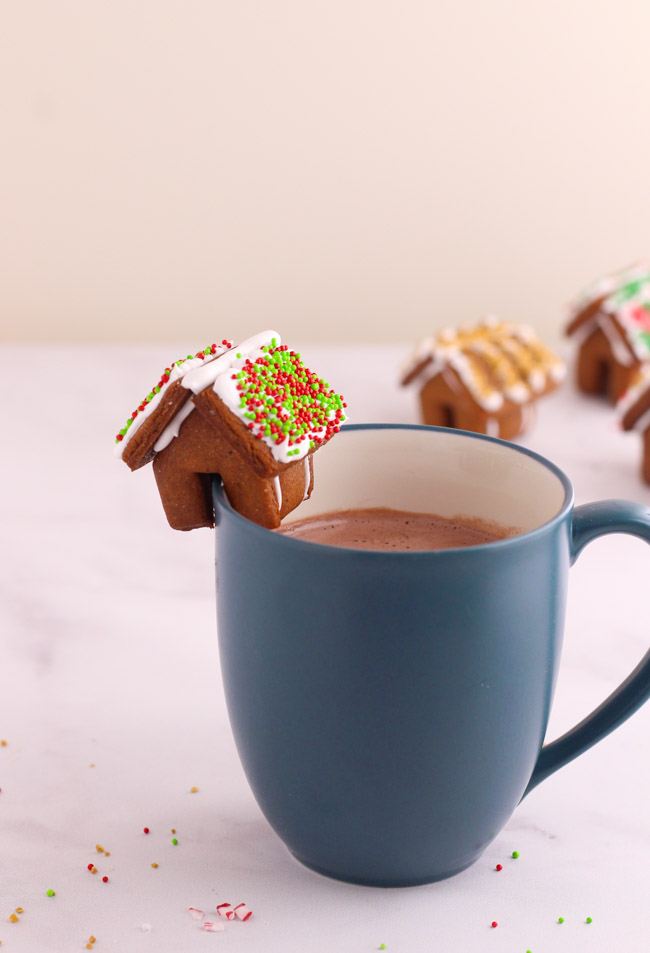
The last reason I love these houses are because they can hang on the lip of a mug! The cuteness just keeps on going. These houses are delicious alongside cocoa or coffee. It’s such a happy holiday treat. This recipe will make about two dozen houses, which means you can keep some for yourself and give some as gifts. I brought these two work and while some were eaten immediately, some were lovingly kept for a few days because they were so pretty.
While I’m not generally good at piping or decorating, I found these houses so much fun to make and assemble. Can’t wait to do it again this weekend with my friends. And I think, maybe it’s going to be my go-to holiday bake. What’s your favorite gingerbread recipe or holiday cookie? I’d love to try it!
Adapted from Honestly Yum.
 Messy level: The recipe itself isn’t so messy. You will need two bowls and a small saucepan. The messiest part is flouring your work surface to roll out the cookies and then decorating them. While most of the time a kitchen covered in flour and other ingredients annoys me, Christmas cookie baking gets a pass. A kitchen covered in sprinkles feels festive.
- 3⅓ cup/ 420 grams all purpose flour
- ¾ teaspoon of cinnamon
- ¾ teaspoon of ground ginger
- ¼ teaspoon cloves
- ¼ teaspoon of salt
- pinch of nutmeg
- ½ cup and 2 tablespoons/ 125 grams of brown sugar
- ¾ cup/ 255 grams of molasses
- 8 tablespoons/ 113 grams butter
- 8 ounces/ 230 grams powdered sugar
- 2 egg whites at room temperature
- ⅛ teaspoon of cream of tartar
- sprinkles, crushed candy, or whatever you like!
- In a large bowl, stir together the flour, cinnamon, ginger, cloves, salt and nutmeg.
- In a small saucepan over medium, combine the molasses, brown sugar, and butter. Stir continuously until the butter is melted and the sugar has dissolved.
- Stir the liquid into the flour mixture. Fold all ingredients together with a wooden spoon or silicon spatula. As it starts to come together, use you hands to fold in the last bit of dry ingredients.
- Shape the dough into a ball and flatten slightly into a disk. Wrap with plastic wrap and put in the fridge or at least one hour, or over night.
- When ready to bake, preheat the oven to 350°F/180°C.
- Flour your work surface, then roll out the dough to ⅛-1/4" thickness. Line your baking sheets with parchment.
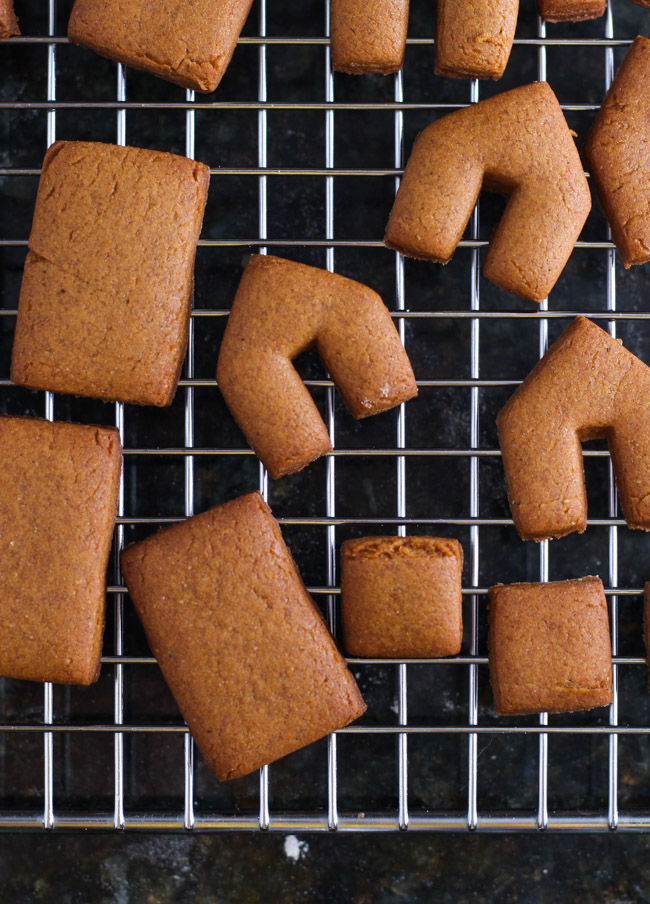
- Use a template or cookie cutter (see info in head note for more) to cut out the house shapes. You will need to use the cutter or template twice to make one house. Scrape up any scraps and re-roll until you've used all the dough. (Or make some houses and some other shapes if you want to use other fun cutters!)
- Bake in the oven for 10-12 minutes.
- Let the cookies cool completely on a rack before icing.
- While cookies are cooling make icing. Sift the icing sugar into a large bowl.
- In the bowl of a stand mixer (or using hand mixer), start to beat the egg whites. Then, slowly begin to stir in the sugar and cream of tartar.
- When the sugar is incorporated turn your mixer to high and beat until for 5-7 minutes or until the icing is white and thick.
- Transfer the icing to a piping bag fitted with a small tipped nozzle.
- Ice one side piece cookie to one front piece cookie. Let those pieces harden and connect completely before assembling the rest of the house.
- Then, decorate the roofs. Cover the roof pieces completely with icing or using the icing to make decorative patterns. Then liberally sprinkle colorful sugar, sprinkles, or crushed candy over the icing. Let dry completely.
- Using the icing as bonding glue, add the other side and back piece to the front and side you already assembled. Then using the icing to add the roof. You can add a line of icing between the two sides of the roof, then add sprinkles if you like.
- Let dry.
- Serve as they are, or on the lip of a mug full of cocoa or coffee.

