When I started my blog I just did whatever I wanted and approached everything willy-nilly. I didn’t have any clue what I was doing! (And I’m still learning) But as my love for cooking and blogging grew, I knew I needed help and to find resources where I could learn more. Below are a list of items and resources that I have found incredibly helpful and that have significantly improved the quality of my blog. If you’re a blogger, or thinking about becoming one, I hope these resources could be helpful to you.
Disclaimer: Please note that most of the links below are affiliate links and I will earn a commission if you purchase through those links. I use all of the products listed below and recommend them because they are companies that I have found helpful and trustworthy. If you have questions about the items below, feel free to contact me.
 HostMonster – I decided to move from free WordPress.com, to self hosting because I could have more storage and more control over content and design. I like HostMonster because it is affordable and easy to use. I can also still use the WordPress system without having a wordpress.com site. Also their customer service is so helpful! When I first started I accidentally deleted something critical to the running of my site. I logged in to the online chat support and my issue was resolved in two minutes! Interested? Click on the icon above.
 Food Blogger Pro – This online community has been a godsend! I have learned about the in’s and out’s of WordPress design, I’ve learned about plugins, optimizing SEO, what SEO and other jargon means, and how to drive traffic. Although focused toward food blogs, there is plenty of useful information for any new blogger who wants to know how to create a good looking and well-run blog. Learn more and sign up for Food Blogger Pro here.
 How to Monetize your Food Blog– I knew there were bloggers out there who made money, and even ones made their living from blogging, but I had no idea how they did it! I’m nowhere near that level, but this book has helped me generate some income. This ebook taught me how to join ad networks and affiliate programs. I also learned some of the lingo and about available networks. I loved that this was giving me the tools to possibly make some profit from a hobby that I love. Most of this book’s information could apply to any blogger – not just those who write about food. Click here to visit buy the book.
 Tasty Food Photography – This book gave me the skills and knowledge to improve my photography immediately! It gave me ideas about lighting, props, and how to use photography to drive traffic. The first post I wrote after reading this book was my corn chowder post. I submitted pictures of the soup to various photo sharing sites and when one was accepted I saw a significant increase in my page views. Seriously, almost double the usual viewers. I saw immediate results from this book, and I bet you can too.Click here to view more details about this book.

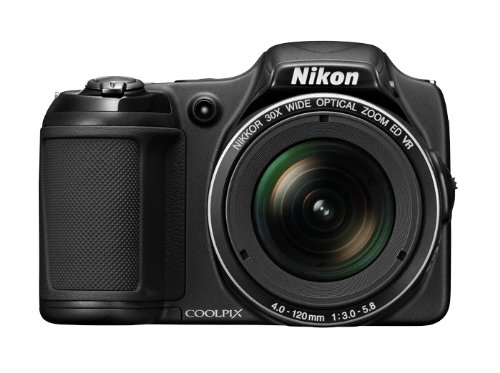
Nikon COOLPIX
– The first “real” camera I used for my food photography was a Nikon COOLPIX L820. Before that I used my iPhone, but when I switched I saw a noticeable difference in the clarity and quality of my photos. The COOLPIX is a digital point and shoot camera with an incredible zoom. A lot of bloggers use a DSLR so they can have manual settings, but this worked well for me at first. The camera made the decisions on setting so I could focus on cooking, set up, and plating. It’s a really good way to start in photography. The camera has a lot of great settings and can also take video.
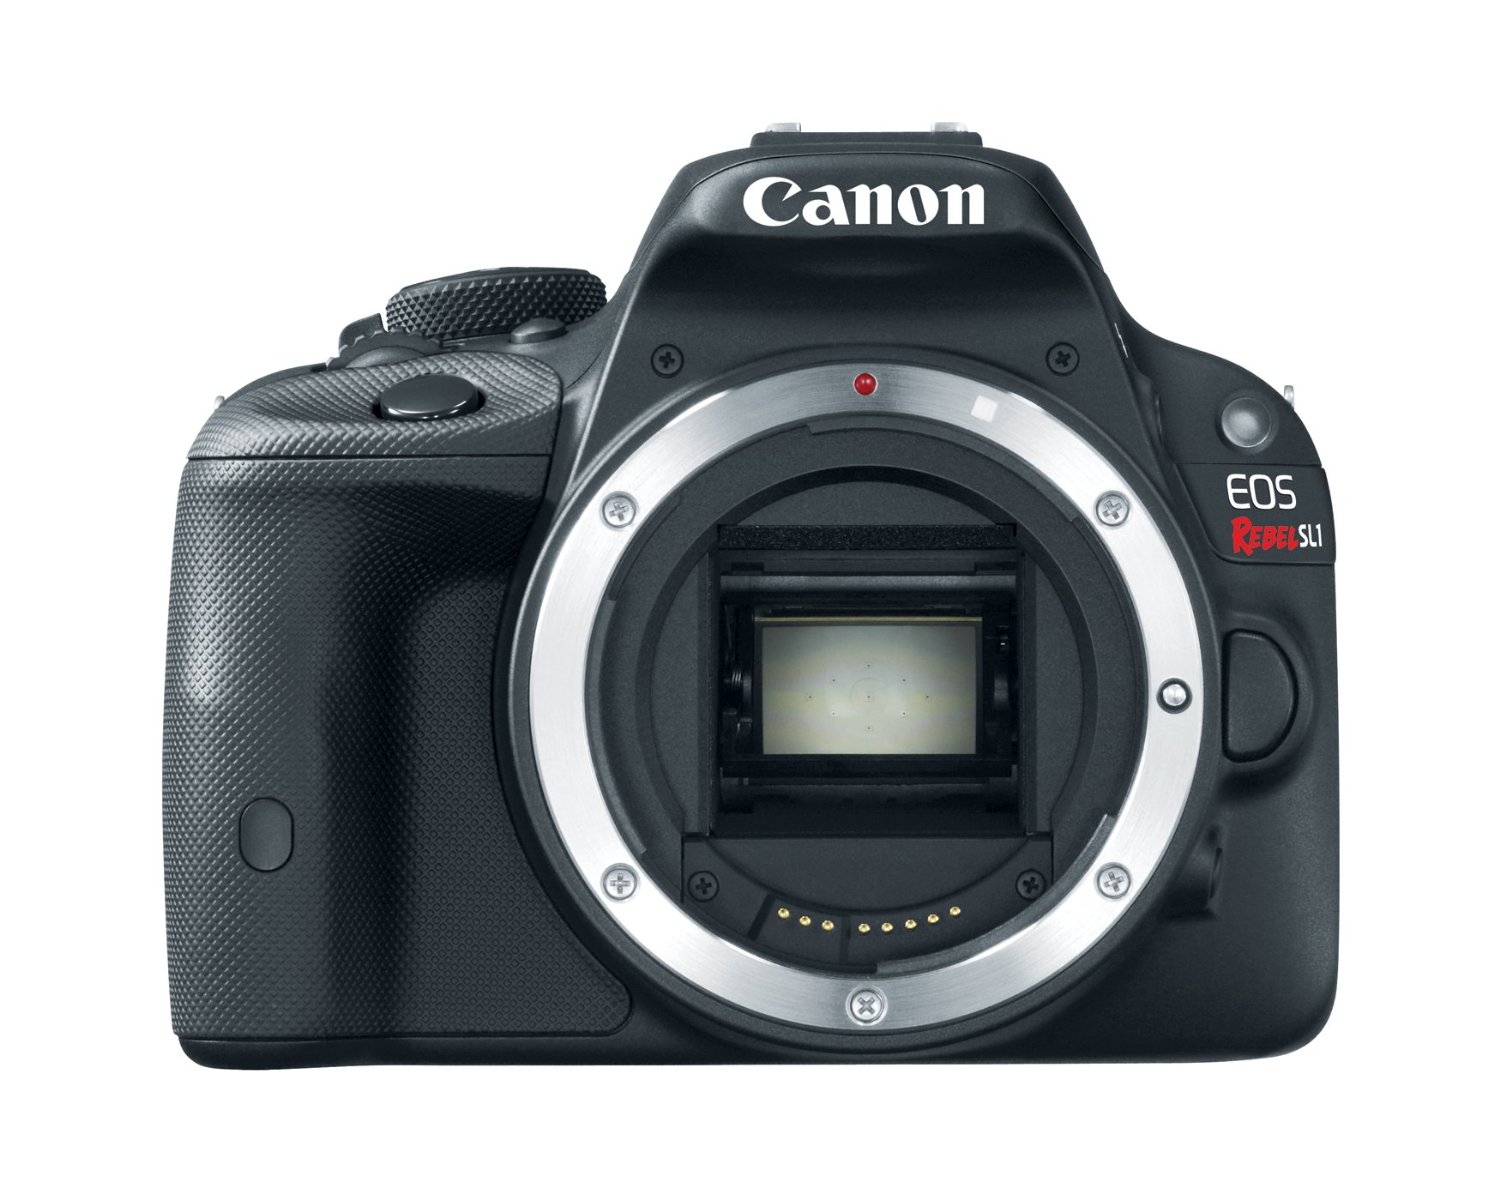
My first DSLR is a Canon EOS Rebel SL1. It’s a great camera for photographers new to manual settings. It’s light, fairly compact, easy to use, has some fancy features but not so many you’d get overwhelmed. You can also do some amount of automatic shooting which can be helpful if you’re on the go or if you get frustrated. Sometimes if I can’t a photo right I try automatic, see what settings that used, then try to adjust from there. It’s a really lovely camera and won’t break your bank like some other DSLR’s will! Overall, I’m really enjoying learning on it.
 I got a lens kit with my DSLR, but the lens I like using the most is the Canon EF 50mm f/1.8 STM Lens
. It’s a fixed lens, which means there’s no zoom, but also that you get nice crisp clear photos. I also like it because it’s easy to get up close to the food and get yummy shots. It has a wider range of settings than what you might need for food photography, but that makes it more generally versatile. Also, again it’s fairly affordable as lenses go.
 My newest lens is the Canon EF-S 60mm f/2.8 Macro lens
. It’s been really fun and perfect for those in-your face mouth watering shots. It’s expensive, but I’ve loved it. With this lens photography can get up close and with a narrow focus and a really shallow depth of field. I love getting to have such a close eye on food!
Other Links:
- How to Start a Food Blog from firstsiteguide.com. A free site that offers video tutorials and links to help you get your blog off the ground.
- How to Make a Light Box from Oh She Glows. Natural light helps make the best photographs, but sometimes you’re not ready when the sun is out. This light box tutorial will help you make the best of indoor lighting.
- How to Make a Collapsible Light Box from Kiddie Foodies. I don’t have a lot of natural light in my flat so I needed a light box. I also have a tiny space so I needed something collapsible. This step by step guide is cheap, easy, and works perfectly. All my very white background photos are shot in a light box made using these instructions.
- Website Hosting Service Explained from firstsiteguide.com. Deciding whether or not to host your own site is an important step with blogging. When I decided to do it I was overwhelmed by choice. What makes one hosting service better than another? This free guide can help you learn what you need to make an informed choice.

