The post Vegetable Volcanoes appeared first on Cooking is Messy.
]]>
I’ve been trying to figure out ways to make vegetables a bigger part of my lunch. As you might know, I love hiding greens in my breakfast smoothies, and I always make some type of vegetable with dinner, but lunch usually gets left out. The other thing is, in general, I’m not sure if I eat enough vegetables on a regular basis so I wanted to come up with an easy and delicious way to do that.
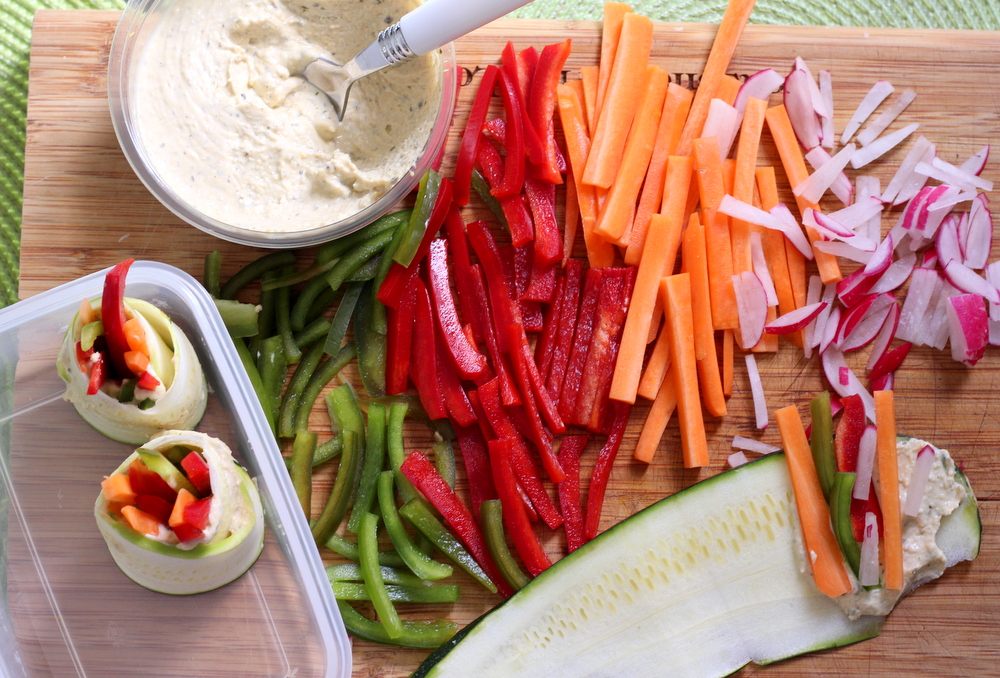
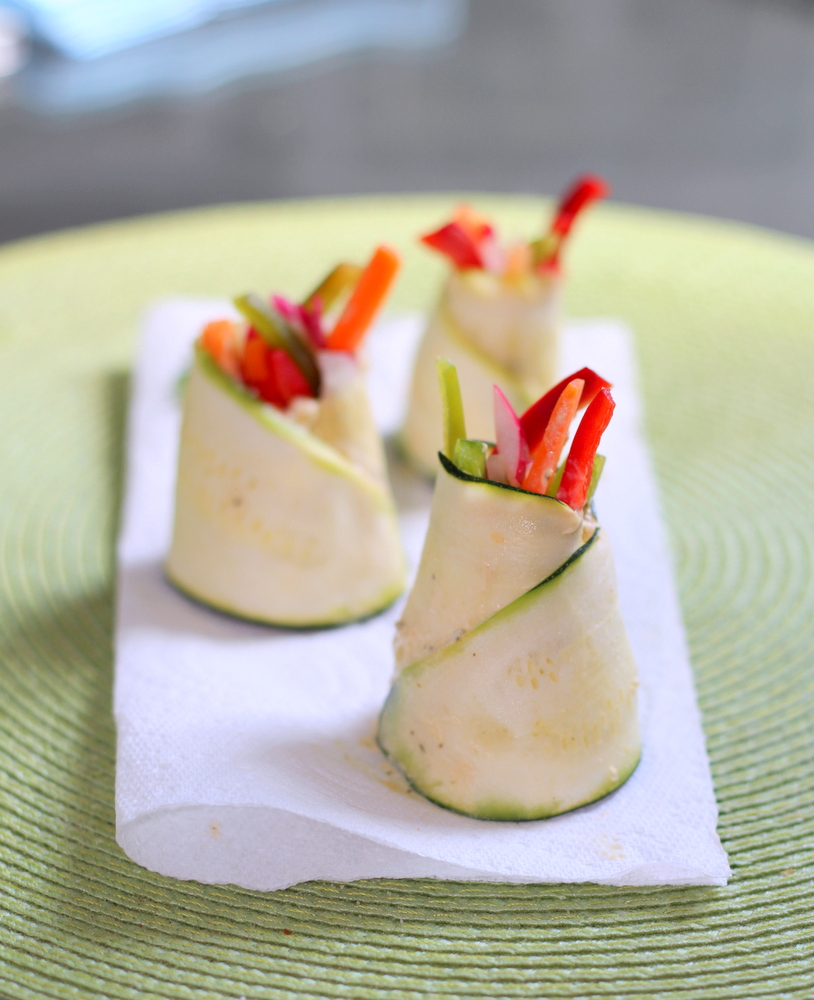
A lot of my food inspiration comes from Pinterest and I saw a picture of vegetable “sushi” and I knew I needed to recreate it for myself. My finished products look a little more like volcanoes than sushi, so I decided to rename it. Also, volcanoes sounds cool and maybe that will help non-veggie eaters to get more excited about vegetables. Basically, this whole thing is combining dip and vegetables in one small bite-able package that you can pack away in your lunch box. I mean yes I could just have hummus and vegetables. However, when I do that sometimes I eat more hummus and only a few actual sticks of vegetables. This gorgeous little package means that I eat more vegetables, more kinds of vegetables, and only a little hummus.
I really like this recipe in part because I’m big on the idea of “eating the rainbow,” or basically trying to eat lots of different colors of fruits and vegetables. It’s meant to be good for you because you get lots of different vitamins and minerals. Also it just look delightful.
This recipe is also really flexible to your tastes because you can use whatever vegetables you like or have on hand. For example, if you have a farm share with tons of vegetables you don’t know what to do with – this can be a way to redistribute them (think kohlrabi or garlic scapes). For example, I like radishes but I don’t ever know what to do with them and this helps use them up. Finally, if you are able to make them neatly you could serve them as a appetizers for a party. So simple, yet so versatile.
 Messy level: The hummus can squish out of the wraps and make a bit of a mess and hurt the presentation. But when all’s said and done, that’s barely a mess right? Just get some more vegetables and sop it up and the mess is clean.
- 1 zucchini
- 1 carrot
- 1 green bell pepper
- 1 red bell pepper
- 2 small radishes
- other vegetables and herbs as you like
- hummus
- Cut the zucchini lengthwise in thin strips. This is best done with a mandolin, but you can do it as well with your knife or with a peeler. You want the zucchini thin enough to roll but thick enough to hold its shape.
- Cut the rest of the vegetables into thin matchstick strips about 1.5-2 inches long. The cut doesn't have to be perfect don't worry.
- On a clean work surface lay our your zucchini slices.
- Spoon a healthy dollop of hummus on one end of the zucchini. Spread it out so it's covering about ¼-1/3 of the zucchini slice. (Ryan spread it across the whole thing, that works too but it's a bit messier when you take a bite)
- Place a bunch of the matchstick vegetables on top of the hummus.
- Roll up the zucchini so the vegetables are held in a tight bunch.
- Take your spoon and place a little hummus on the inside edge of the zucchini. This is the "glue" that is going to hold your volcano together.
- If it's looking a little empty, you can shove in a few more slices of vegetables through the opening in the top. Fill until it's full enough for your liking (but can still hold its shape).
- Place on a plate or in your lunch box.
- Serve with a napkin, eat and enjoy! Any leftover vegetables dip into the leftover hummus and eat it the old fashioned way.
The post Vegetable Volcanoes appeared first on Cooking is Messy.
]]>The post Vegetarian Tortilla Soup appeared first on Cooking is Messy.
]]>
When I made Greek salad, I told you that I’ve finally decided to use Twitter. I’ve been skeptical about using Twitter, but then I saw someone tweeted about starting a Cookbook Club and I thought, “what a good idea, I guess Twitter is useful.”
The method behind a cookbook club is that the group picks a book and throughout the month, or two, or whatever the time period is, the group cooks a few things from the book. Then on the meeting day everyone in the club has a potluck and brings a dish using a recipe from the book. I think this is awesome because it would force me to cook a few things from the book and it would also allow me to try other dishes without having to do the work. Sounds like perfection. Also, when I’ve done normal book clubs, we never talk about the book anyway.
The most recent addition to my cookbook collection, and the one I’m itching to cook through is the Thug Kitchen: The Official Cookbook. It was given to me as a Christmas present by my wonderful friend Charlotte. She is the kind of amazing and thoughtful friend who sends me flowers on my birthday and also when I’m having nervous breakdowns about being an adult. She sends me care packages with American candies and tiny models of ramen noodles. And I in turn, I send her boxes with no card inside and I buy British sweets and leave them in the bottom of my closet and forget to mail them. Anyway, when I got this book I was so excited and sent Charlotte this crazy picture.
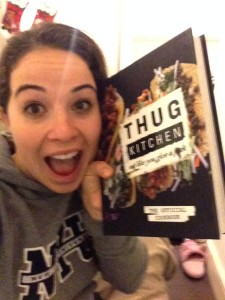 This book is awesome. I’ve literally snuggled up in bed and poured through the book as my bed time reading. The writing is funny and they don’t take themselves too seriously. The recipes tell you when you can make substitutions, when to be precise, and when you can be a little messy. All the recipes are healthy and vegetarian – but they never come off snobby for being healthy or too much like hippies for adding chia seeds or tofu. The authors are really encouraging that anyone can eat healthy, they recognize when they’re asking you to use “scary” ingredients, and the recipes are so full of flavor you won’t miss meat.
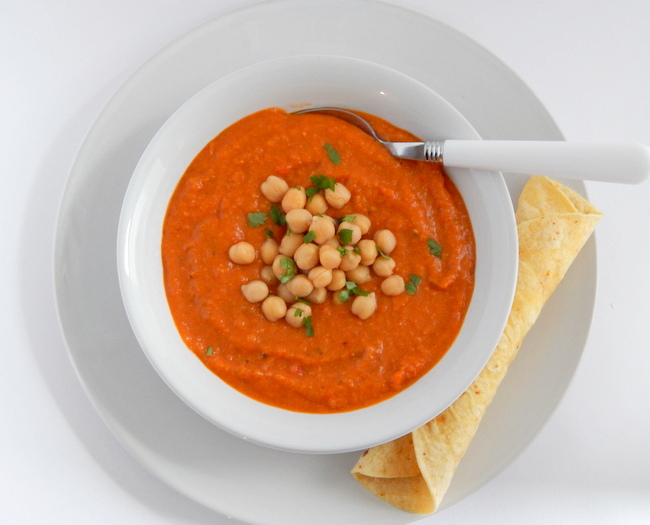
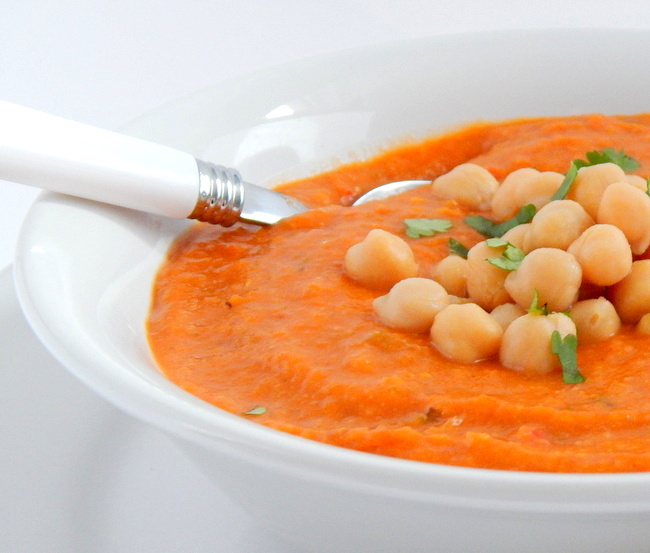
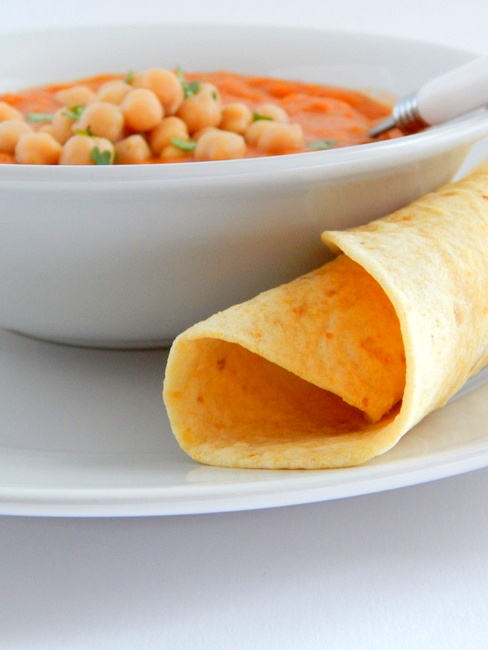
Seriously. For example, today’s soup packs a real kick. It has a tomato based and chickpeas to cool it down, but there’s a kick of garlic, chili powder, and jalapenos. It’s a nice soup on to warm you up on a cold winter day. It would be even better for when you’re sick because it would clear your sinuses right out. You can definitely turn down the spice if you prefer, but as written – it’s really spicy. All in all, it’s packed with veggies and you won’t need unusual ingredients. Pair it with a corn tortilla on the side, and you’ve got a meal with some zip.
 Messy level: This recipe is a hard one to rate. You’ll need one big soup pot, a knife, and a cutting board. If you have an immersion blender this is a lot easier, and cleaner. If you don’t, you’ll have to use a blender which takes more time and there might be spills.
- 1 tablespoon olive oil
- 1 yellow onion, chopped
- 1 carrot, chopped
- 1 bell pepper (I used red), chopped
- 1-2 jalapenos, minced
- 4 cloves garlic, minced
- 2½ teaspoons ground cumin
- 2½ teaspoons dried oregano
- 2½ teaspoons chili powder
- ⅛ teaspoon salt
- 1 14.5 oz (400g) can diced tomatoes
- ¼ cup tomato paste
- 5 cups vegetable broth
- 1 tablespoon lime juice
- 4-8 corn tortillas, cut into 1 inch squares (the more you use, the thicker the soup)
- 1½ cups cooked chickpeas or 1, 14oz/400g can of chickpeas
- chopped cilantro for garnish (optional)
- In a large soup pot over medium-high heat, cook the onion in the olive oil. Cook for about 2 minutes, or until the onion is a little bit translucent.
- Add the carrot and bell pepper to the pot. Cook for another 3 minutes, until everything started to get golden.
- Add the jalapenos, garlic, cumin, oregano, chili powder, and salt to the pot. Stir for about 30 seconds. Everything will get pretty fragrant now!
- Add the diced tomatoes and tomato paste to the pot and stir so that everything is well mixed.
- Pour in the broth and bring everything to a simmer.
- Once it is simmering, add the lime juice and tortilla squares. Let everything simmer for about 10 minutes to soften the tortillas. Stir occasionally.
- Remove the soup from the heat. If you have an immersion blender, blend everything until smooth. If you don't, then use a regular blender and blend the soup in batches.
- Pour some soup in a bowl, spoon some chickpeas in the center of the bowl, and sprinkle cilantro on top if you're using. Serve.
The post Vegetarian Tortilla Soup appeared first on Cooking is Messy.
]]>The post Bulgur Greek Salad appeared first on Cooking is Messy.
]]>
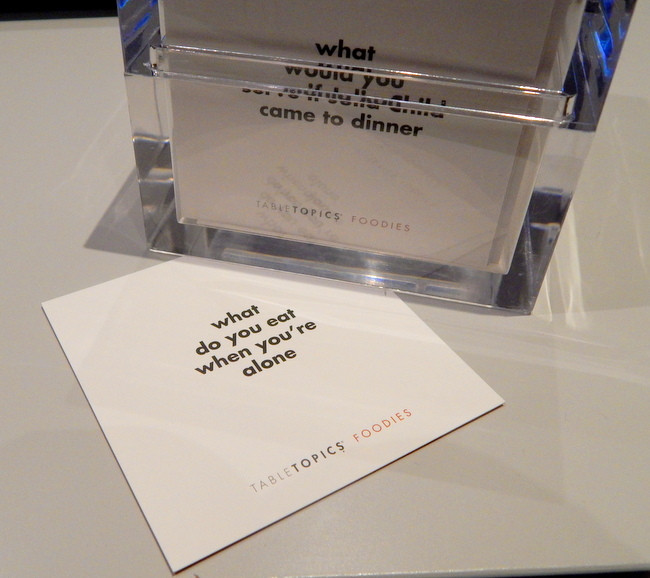
For Christmas my sister-in-law bought me a box of conversation cards with questions all about food. Some of the questions are a little bit silly like, “has our love of bacon gone too far?” (Yes, bacon is nice, but bacon maple frosting is too far) Some are really fun to think about like, “what would you serve if Julia Child came to diner?” (Probably something Puerto Rican since maybe she wouldn’t have eaten much of that before)
One question I really like is, “what do you eat when you’re alone?” I like this question because the answer encompasses a whole range of foods. When I’m lazy, I like popcorn, a spoonful of Nutella, and cheese and crackers. Sometimes when I’m alone I like to try something really difficult to make because then if it comes out badly, no one else knows. But my favorite thing to eat when I’m on my own is Greek salad. I love Greek salad. It’s crunchy and salty. It’s pretty healthy, but it’s got some indulgences with the olives and cheese. And I just love all the flavors and I eat it whenever I can. When I was in grad school writing my thesis, I’d run down to the deli beneath my apartment and grab a salad on a break. When, it was too loud and crazy at when I worked at Ford’s Theatre, I’d run to Cosi for lunch and get one. And now I always search for it on takeaway menus.
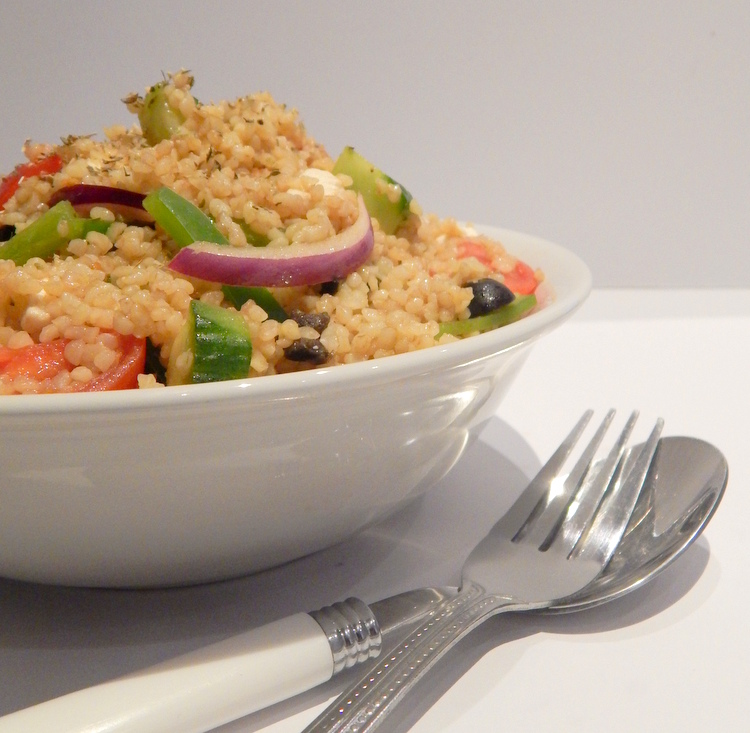
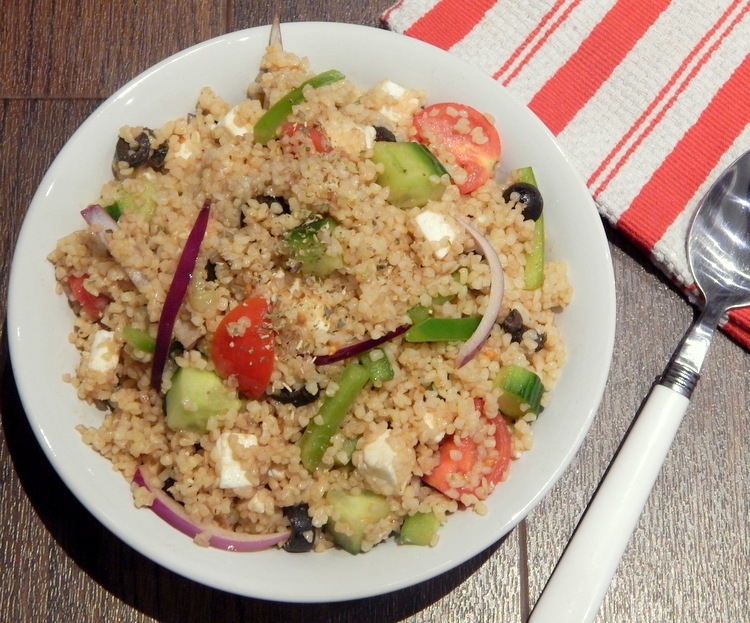
And also, I eat Greek salad when I’m alone because Ryan doesn’t like olives and feta. But sometimes I can’t resist, and I make it for dinner anyway. I wanted to make it a little heartier, so I decided to substitute the greens for bulgur, but still keep all the yummy other vegetables. This was the first time I ever had bulgur and it was so good! It’s small like quinoa, but chewier like rice. Also I like that it’s got an uneven shape.
To be honest, although it’s a straightforward salad recipe, I feel a little nervous sharing this! I have two Greek coworkers who sometimes ready this blog, and I’m changing up a traditional dish. That feels somewhat taboo. But in truth, this recipe is like tabbouleh and regular Greek salad fell in love and had a delicious hybrid child. So it’s like two wonderful Greek recipes in one. This is yummy, a nice side dish, and Ryan even liked it (without the feta and olives).
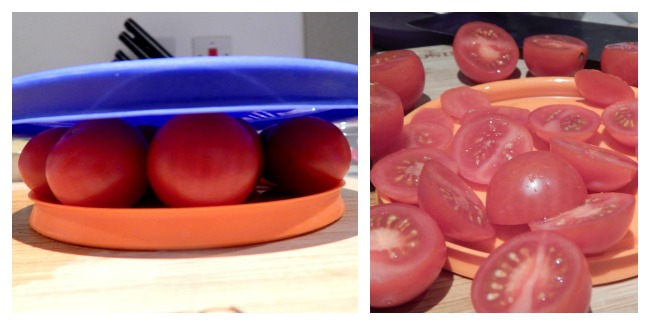
One last thing before the recipe – I have a tip on cutting cherry tomatoes. Cutting a lot of small circular foods is kind of annoying and time consuming. To speed up the process, take two lids from food storage containers. Put your tomatoes (or grapes or pitted cherries or your circular whatever) between the two container lids. Make sure your knife is sharp, then carefully cut horizontally between the two lids. Then boom, you’ve got lots of tomato halves in one slice. Some might be a little uneven, but for a salad that’s not really important. I really like this trick because I think it makes preparing a salad less tedious and it’s a fun trick. Sorry, I don’t have a trick for cutting tomatoes into quarters.
Unrelated to this post, after three years of having a Twitter account, I’ve decided to finally start using it. For real, I’m going to start tweeting and stuff. Help me get up and running! You can follow me @mariel621. Thanks!
 Messy level: Salad is so easy and neat – if you plan it properly. You’ll need a cutting board, knife, and a saucepan for the bulgur. You could use a separate bowl to mix it all together and serve, but if you have a large enough saucepan you can do it in there. I didn’t have a large enough saucepan, then I transferred it to a mixing bowl that was too small, and then I finally got it right and put it in a big enough bowl. Don’t make my mistakes, and it’s a one spoon recipe.
- 1½ cups bulgur
- 3 cups water
- ½ cup cherry tomatoes in quarters
- ½ cup cubed cucumber
- 1 green bell pepper, chopped (or in strips if you prefer)
- ½ red onion, cut into matchsticks
- ⅓ cup pitted kalamata olives
- ⅓ cup crumbled feta cheese
- 2-3 tablespoons olive oil
- 1-2 tablespoons balsamic vinegar
- oregano (optional)
- In a medium saucepan, combine the bulgur and water. Bring it to boil.
- Once the water has come to a boil, cover, and lower the heat. Simmer until all the water is absorbed. It should take about 15-20 minutes, but check what the package says.
- While the bulgur is cooking is cooking chop up all of your vegetables
- When the bulger is finished, fluff it with a fork and let cool to room temperature (or just slightly warm).
- Stir the vegetables into the bulgur.
- Pour the olive oil and balsamic over the bulgur and vegetables. Taste and adjust as you prefer. I like only a little balsamic to give it a nice tang, but not over power the dish.
- Serve and sprinkle with a little oregano (dried or fresh) for garnish.
The post Bulgur Greek Salad appeared first on Cooking is Messy.
]]>The post Bison Nachos appeared first on Cooking is Messy.
]]>
One of the things I wanted to eat while in the US was nachos. You might be thinking to yourself, “Mariel, they have to have good nachos somewhere in the UK.” And they probably do, but I was burned – and burned bad. So I’ve only had nachos once in London and didn’t want to risk it again.
Here’s what happened: Ryan and I went to a pub to watch the Arsenal match. We had a few pints and started to feel hungry and we thought, “What kind of bar food do we want? Oh, nachos sounds good!” So we ordered them, not thinking about where we were. Because in the US you can have satisfying nachos pretty much anywhere.
When our plate arrived there were some chips, a smattering of cheese, and big dollops of sour cream and watery salsa. No meat, no beans, no veg, no gooey-ness. I mean, we ate it of course, but I was disappointed. Since then I’ve stuck to homemade nachos.
In Colorado, Katy (my sister-in-law) suggested we make nachos for when we watched the Broncos football game. Boden was our adorable little helper who let us dress him as a football. Isn’t he freaking cute? I made a photo of him the background on my phone and it makes me so happy! Ok but I’m digressing, let’s get back to nachos.
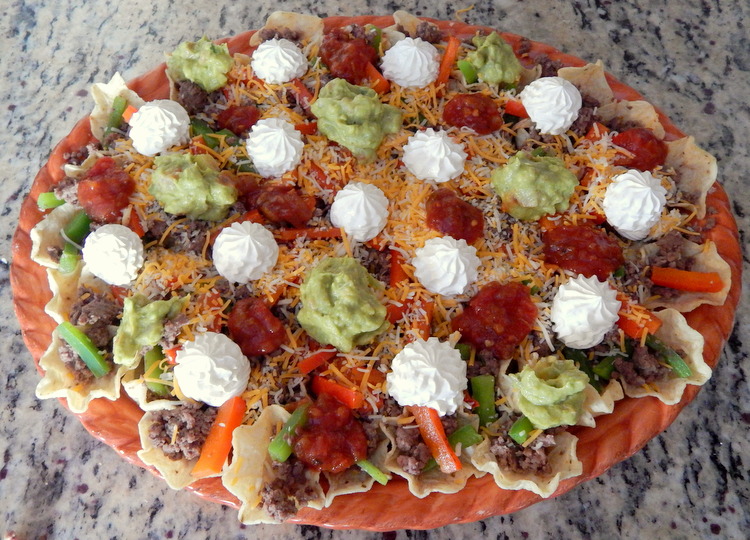
So the thing is, you don’t really need a recipe for nachos because there’s plenty of room for improvisation. We used bison meat which I’d never cooked before this! It’s leaner than beef and has a really delicious flavor. We didn’t add much to it in terms of seasoning, but it was so flavorful! I know you can get bison meat all over the United States, but being at the edge of Plains and having bison meat somehow felt authentically Colorado. Maybe it’s not authentically Colorado, but that’s how it felt. Anyway, instead of bison, you can use ground beef or turkey, sliced chicken breasts, or beans. In fact, go bigger and make a combo and use both meat and beans!
You can also make nachos really homemade or somewhere in between. We bought jarred salsa but we made guacamole. However, instead of chopping up tomatoes, onions, cilantro and jalapenos we bought pre-made pico de gallo. You can find pico de gallo in the refrigerated section on the produce department. Or, if you want to make your own here’s a recipe from the Pioneer Woman. So find your perfect balance and make what you want or buy what you want.
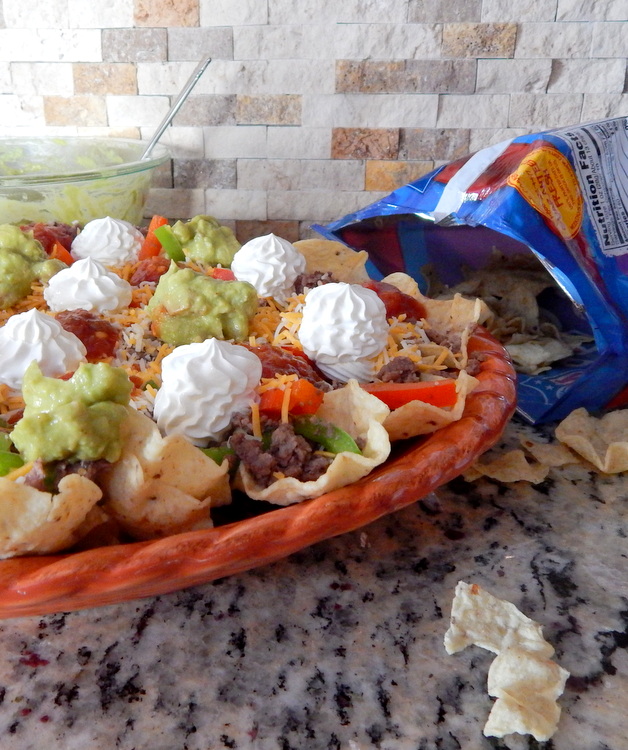
The key to good nachos is layering. Katy’s secret to good nachos is two layers of cheese. First, a layer of chips, then cheese, then meat, then toppings, then cheese, then salsas. Double cheese layers add extra deliciousness and work as a glue to hold all your nachos fillings together. Genius right?
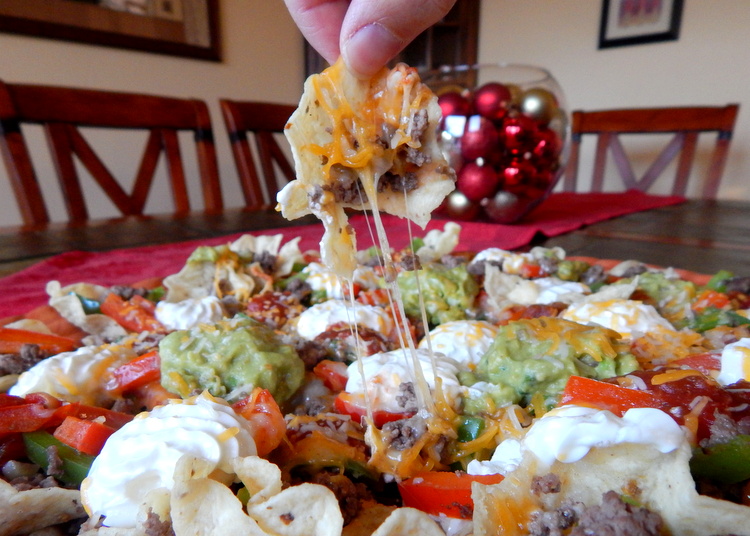 Last thing, Katy is responsible for the beautiful sour cream piping. Those clouds of sour cream are gorgeous! What’s great about nachos is you can make them your own, and so we decided to make them beautiful.(I alternated in the spoonfuls of guac and salsa) But, it needs to be said that I am so impressed with Katy’s piping as I’m terrible with a piping bag. We decided we would be a perfect team in a bakery – I prefer the baking and she prefers the decorating. Win-win baby. Anyway, presentation is important to making tasty food look even more desirable so artfully dollop on your salsas and once you serve people will be dying to dig in.
 Messy level: One spoon. Nachos are so easy! For preparation we only needed one skillet and a bowl to make the guacamole. Everything else just gets layers on the main serving platter. Easy and clean – that is until you start eating.
- olive oil
- 1 pound ground bison meat (or substitute ground beef or turkey)
- 2 cloves garlic, finely chopped
- 1 red bell pepper, cut into thick matchsticks
- 1 green bell pepper, cut into thick matchsticks
- 2-3 ripe avocados
- 1 cup pico de gallo
- 1 lime, sliced in half
- salt
- 1 tsp garlic powder
- ¼ tsp chili powder
- 1 bag of your favorite tortilla chips (we used Scoops)
- 1 cup shredded cheddar cheese (you might not need it all)
- ½ cup salsa
- ½ cup sour cream
- Heat a splash of olive oil in a saucepan over medium heat.
- Once the oil is hot, add the garlic and ground bison. When 75% of the meat is browned add in the bell pepper. I like adding it here to soften the peppers up a bit and give them some more flavor. Remove from the heat once the meat is completely browned. Set to the side.
- Cut the avocado lengthwise around the pit. Now you'll have the avocado broken apart into two halves.
- Using a spoon, scoop out the pit and set it aside.
- Scoop out the avocado flesh into a medium bowl. Using a fork, mash up the avocado until it is smoother but still with some chunks.
- Add the pico de gallo to the avocado. Mix thoroughly.
- Add garlic powder, chili powder, and salt (to your taste) to the avocado mixture. Squeeze half the lime in too. Taste and adjust the seasonings. Add the other half of the lime if you like it, add more garlic and chili powder if you want more "pop." Now you've got guacamole. Add the avocado pits back in to the guacamole. This keeps it from getting immediately brown.
- Arrange the tortilla chips onto a large serving tray.
- Sprinkle half the shredded cheese over the chips.
- Spoon the ground bison and bell pepper mixture evenly over the cheese.
- Sprinkle the other half of the cheese over the meat.
- Put the serving tray in the microwave and heat on high for 1 minute at a time, until the cheese is melted.
- Artfully dollop the sour cream, salsa, and guacamole evenly on top of the cheese.
- If you have more cheese left over, sprinkle a little more on top.
- Serve while hot and gooey!
The post Bison Nachos appeared first on Cooking is Messy.
]]>The post Amazing Corn Chowder appeared first on Cooking is Messy.
]]> I’ve had a bag of frozen corn in my tiny freezer for two months. This is unacceptable because the freezer is tiny and if it is full of corn, there isn’t any room for ice cream. I have my priorities.
I bought the corn when I made barley succotash and I’ve had the leftover bag ever since. When I need to add a vegetable for dinner, I often tell myself I’ll just heat up the corn, but I never do. I like corn on the cob, corn bread, and corn in things. But plain corn on the side isn’t very interesting to me and so the bag languished in the freezer.
Then I saw a fairly recent post from Amateur Gourmet for corn chowder. I thought this would be perfect, but then he said it wasn’t worth doing with frozen corn. Sigh. It’s the end of the summer and corn season is over so I moved on.
Until it was Monday. On Monday nights I like to go to Zumba. I like to eat before Zumba so I don’t feel faint and famished but I can’t eat too much or I’ll feel sick. But, I also need to make something hearty enough so Ryan has a real dinner and not rabbit food. So I thought back to corn chowder, and advice be dammed, I was going to try it with frozen corn!
 I’m so glad I did because this soup is freaking delicious! The soup is wonderfully flavorful. This is one of the best soups I have ever had. The corn gives it sweetness and the cayenne pepper (which is my personal addition) gives just the whisper of heat. And the cream makes it feel so rich, but with only one cup in the whole pot you don’t have to feel too guilty. It is hearty but not heavy (seriously, I went to Zumba and felt fine and thought about the soup the whole time). Ryan gave it a 9 out of 10. I kept loudly saying, “this soup is so good!” I was mad when I had to leave for class and couldn’t have a second bowl. Try it, this is a wonderful soup.
Adapted from Amateur Gourmet who adapted it from Jasper White.
Messy level: There is a lot of cutting prep work for this recipe, that’s the only reason I will give it a 2 spoon rating. Otherwise, it’s just dump it all in the pot and wait for it to get delicious.
- 3-4 cups of frozen corn
- 4 oz of slab bacon, cut into ⅓" dice
- 2 tbsp butter
- 1 yellow onion, diced
- 1 red bell pepper, diced
- 5 sprigs thyme, leaves removed and chopped
- ½ tsp ground cumin
- ⅛ tsp turmeric
- ¼ tsp ground cayenne pepper
- 1 lb Yukon gold potatoes peeled, and cut into ½" cubes
- about 5-6 cups of chicken stock (enough to cover everything)
- salt and pepper, to taste
- 2 tsp cornstarch dissolved in 2 tbsp cold water
- 1 cup heavy cream
- 2 tbsp minced chives
- In a large heavy pot, cook the bacon over medium heat. Cook until the bacon is crisp. Spoon out all but a tablespoon of the bacon fat.
- Add the butter, onion, bell pepper, thyme, cumin, cayenne pepper, and turmeric. Look at the pretty spices! They will make the soup pretty too. Add a pinch of salt. Cook for 8 minutes, stirring every so often.
- Add the corn, potatoes, and stock. Turn the heat to high and bring to a vigorous boil. Cover and cook for 10 minutes.
- Using a wood spoon, smash some of the corn and potatoes against the side of the pot. This will help thicken the chowder. Reduce the heat to medium and taste for salt and pepper.
- Stir in the corn starch mixture.
- Bring the soup back to a boil and stir until the chowder has thickened to your liking.
- Turn off the heat and add the cream. Adjust for salt if you need to.
- Serve and top with chopped chives.
The post Amazing Corn Chowder appeared first on Cooking is Messy.
]]>The post Barley Succotash appeared first on Cooking is Messy.
]]>![IMG_0425[1]](http://cookingismessy.files.wordpress.com/2014/07/img_04251.jpg?w=300) It’s been hot here, although I think the temperature is finally going to break today. I know I shouldn’t complain about the weather. It’s only been in the high 20’s. Crazy I know what that means right? It’s about high 70’s, low 80’s.
It’s been hot here, although I think the temperature is finally going to break today. I know I shouldn’t complain about the weather. It’s only been in the high 20’s. Crazy I know what that means right? It’s about high 70’s, low 80’s.
You’re probably reading this thinking, um, Mariel, that’s not hot. I know – I know, I just moved from DC where it’s hotter than hell. In DC low 80’s would feel like a wonderful cold front because summer is usually 100° with about a million percent humidity. But the thing is, high 70’s is hot here because air conditioning isn’t so much a thing here. Our flat doesn’t have air conditioning, the library doesn’t have air conditioning, and when you walk down the street you never pass a store and feel the cold blast of AC. We got a fan and that helps a ton.
Also going on outings helps too. This past weekend we went to the Banqueting Hall. It was a little hot and stuffy there too – but it wasn’t crowded with sweaty tourists so that made it awesome. The Banqueting Hall is the last remaining part of Whitehall Palace. It is the site of Charles I execution and the ceiling has nine paintings from Peter Paul Rubens. What I loved about the space is that it is large, beautiful, and ornate. The best part though, was the bean bags on the floor. We took our audio guides, flopped onto the bean bags, and looked up at the floor. It was cozy and interesting. The audio tour is just a little bit long, but they did the most with what they had.
The last way to deal with the heat is to stop using the oven when cooking. The oven makes our flat a sauna, so I’ve been trying to make easy stove-based recipes for dinner. I like this one because it’s pretty easy, filling, and includes a few different kinds of vegetables. Ignore the roast chicken in the pictures – that I made in the oven and it was far too hot.
This recipe is from Mark Bittman’s How to Cook Everything Vegetarian.
Ingredients
4 tbsp butter
1 cup pearled barley
salt & pepper
2 1/2 cups water
1 tbsp garlic, minced
1/2 cup frozen lima beans
1 cup frozen (or fresh) corn
1 red bell pepper
2 scallions, thinly chopped
parsley (optional, chopped and used for garnish)
Directions
1. In a medium saucepan, melt 2 tbsp of butter over medium heat. Add the barley toast for 2-3 minutes, stir frequently.
2. Sprinkle with salt and pepper. Add the water and bring to a boil. Cover the saucepan and reduce the heat to low. Cook until most of the water has been absorbed (about 20-25 minutes). Stir the barley occasionally to promote creaminess.
3. In a skillet, melt the other 2 tbsp of butter. Add the garlic and cook for about 1-2 minutes. Add the lima beans and cook for about 5 minutes. Stir to make sure the beans don’t stick.
4. Add in the corn, bell pepper, and scallions. Cook for two minutes.
5. Stir in the barley. Cover and cook, while stirring a occasionally, until the vegetable soften a bit. This takes about 5 minutes.
6. Remove from heat, stir in the parsley if you’re using.
7. Serve!
![]() Messy level: Just two spoons! It’s so easy, only two pans, and very little clean up. It’s yummy, filling, and pretty healthy.
Messy level: Just two spoons! It’s so easy, only two pans, and very little clean up. It’s yummy, filling, and pretty healthy.
The post Barley Succotash appeared first on Cooking is Messy.
]]>The post Piñon (Puerto Rican Lasagna) appeared first on Cooking is Messy.
]]>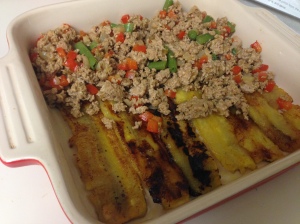 Hi everyone. I wanted to say that I feel guilty I haven’t cooked or posted much in the last two months. And truthfully, it’s not likely to get better until the end of July. I leave for London (for real this time) in one week. ONE WEEK! I have lots to do to prepare! And then, I’ll be there a week before it’s time for me to leave on vacation to Greece. Tough life, right?
But the other reason I haven’t cooked much is that I love cooking for other people and I haven’t had much opportunity to do that. That is until a few weeks ago when I had a girls night at my apartment. It was one last big blow out with my girls before London. The eight of us (not all pictured below) had a potluck and we ate and we drank and we ate some more. In addition to piñon, we had salad, pizza, cheesecake, chips and dip, and raisin bread. Aren’t pot lucks excellent?! You get to eat all kinds of things!
We also talked and told old stories from college and new recent stories. We laughed and laughed and laughed. And finally we dragged ourselves away from the table, we put on some heels and we went out dancing. At the end of the night we came home, ate more food, had a sleepover, and then the next day I made them watch Orange is the New Black. Best night ever. I felt loved, I danced my heart out, and my feet hurt in the morning. It was an absolute blast. Some photos are below. Some are nice and some are weird… so it goes.
But back to cooking. Having everyone over was also the perfect reason to make something off of my recipe bucket-list. I love sweet plantains and I have been wanting to make this recipe forever, I just needed a captive audience. This is lasagna-like only because meat is layered between things and then baked. Otherwise, the ingredients aren’t that similar.
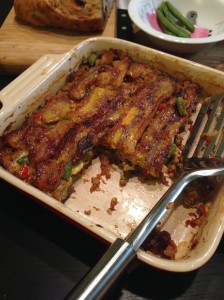
I was making it as the girls arrived and when I opened the door a few people immediately said, “something smells good!” That is always a good sign. I think sweet plantains and meat may sound like a weird combination, but it totally works. Everyone said they liked it, and it has an excellent array of flavors. Try it out.
I adapted this recipe from Wilo Benet’s Puerto Rico True Flavors. I used ground turkey instead of beef to accommodate dietary restrictions. I also cooked the plantains in a skillet instead of in the oven. And finally, I seasoned the meat how I felt like it and didn’t use the cookbook recipe at all. Anyway, have some people over and try it out.
Ingredients:
4-5 ripe plantains
3 oz green beans, trimmed and cut into small pieces
1 lb ground beef or turkey
olive oil
1 small onion, diced
2 cloves garlic, minced
1 red bell pepper, diced
1/4 cup sofrito
2 tbsp cilantro
3 eggs
Directions:
1. Preheat the oven to 300°
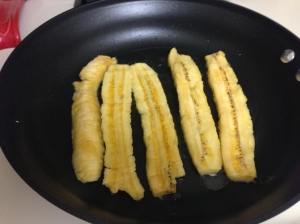
2. Peel the plantains and cut lengthwise into about 4 pieces. To peel the plantains, cut off the ends then score lengthwise. Slowly peel the skin from the fruit. Use your knife to scrape what won’t peel off. Plantains don’t peel like bananas.
3. Heat the oil in a skillet over medium-high heat. When the oil is hot, put in the plantain slices. Fry until they brown a little bit,then flip. Place them on a paper towel to drain the oil. You will have to do this step in batches.
4. Steam the green beans. I did this by putting a little water in a pot, putting a steamer in the pot, adding the green beans, then cooking on high while covered for about 5-7 minutes.
5. In another skillet, heat some oil over medium heat. Once the oil is hot, saute the onions and garlic until they are soft and browned (5ish minutes)
6. Add the red pepper and sofrito. Cook for about 7 minutes.
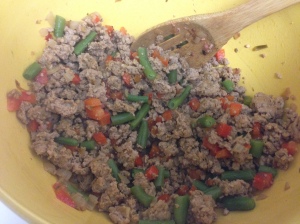
7. Add the ground meat. Break it up using your spoon. Cook until entirely cooked through. When it’s done cooking place on paper towels to drain excess grease.
8. Turn off the heat and stir in the cilantro and steamed green beans. Mix!
9. Oil the bottoms and sides of a 8″x8″ casserole dish.
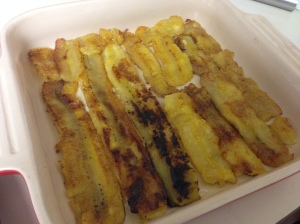
10. Arrange a layer of plantains on the bottom of the dish.
11. Top the plantains evenly with the meat. Press down with your hands or with a spoon to make it all fit tightly.
12. Beat the eggs in a separate bowl. Pour (or spoon/brush) half of the egg over the meat. This egg will help bind your end product.
13. Top the meat with the remaining plantains.
14. Pour the remaining egg over the plantains.
15. Place in the oven and cook for about 35-40 minutes.
16. Slice and serve!
![]() Messy level: This is a four spoon recipe. You need three burners to cook the meat, green beans, and plantains. You also need a dish for the oven. And you have to drain two things to get the grease out. That makes for a lot of dishes!! Also peeling and cutting the plantains is messy work – I had that goop all over the kitchen!
Messy level: This is a four spoon recipe. You need three burners to cook the meat, green beans, and plantains. You also need a dish for the oven. And you have to drain two things to get the grease out. That makes for a lot of dishes!! Also peeling and cutting the plantains is messy work – I had that goop all over the kitchen!
The post Piñon (Puerto Rican Lasagna) appeared first on Cooking is Messy.
]]>The post Rellenos de Papa (Stuffed Potato Fritters) appeared first on Cooking is Messy.
]]> I love kitchen gadgets and accessories. Unfortunately, not all of my gadgets will get moved to London – you know space concerns, different outlet plugs, and such. So I want to use my gadgets before I put them in storage. The deep fryer is number one on that list. (My friends have even asked if I’ll have a deep fryer party).
Anyway, I’ve made today’s recipe before but I thought the deep fryer would take it up a notch. This recipe is a Puerto Rican recipe that is essentially seasoned ground beef, covered in potatoes, formed in to a ball, and then deep fried. Over the years, Ryan and I have made this recipe about a half a dozen times with mixed success. It always tastes good, but often the balls fall apart either while being formed or while in the oil. I thought using the deep fryer would help ensure good taste and good looks.
The true key to success is patience and preparation. You cannot make this recipe when you get home from work and want dinner – time is necessary! The mashed potatoes have to be cold so they can hold their shape. It is also important that the beef is cool. The meat doesn’t have to be cold, but if the meat is hot they will heat the potatoes, and then you’re in trouble. The oil also has to be really hot, which is where the deep fryer comes in because it ensures a consistent temperature. You can totally do this recipe in a pan, but it’s harder to keep the heat high especially if you over crowd the pan.
Anyway, I am really happy with the way this recipe turned out. And, although this recipe is labor intensive, I had so much fun making it. I had dinner first, and then started cooking so I wasn’t hungry as I prepped the meat and potatoes. I was flow state cooking baby! I just let myself cook how I wanted, it was easy and fun. I didn’t use a recipe and I let myself enjoy the process. I made the potatoes and meat on one day, shaped the ingredients into balls the next, and then fried them. Everything worked out really well, I only wish I could make the potato layer thinner so there could be more meat. But, still a very delicious recipe. The rellenos held their circular shape, the outside was crunchy, and the inside was warm and flavorful.
Final note, I didn’t make a perfectly even amount of meat and potatoes. I made some potatoes and some beef and then formed rellenos until I ran out of one ingredient. If you have leftovers, I’m sure you can find other ways to reuse them. Enjoy!
Ingredients
2 1/2 pounds russet potatoes
1 lb ground beef
olive oil
1 small onion, diced
2 cloves garlic, minced
1 red bell pepper, diced
1/4 cup sofrito
2 tbsp cilantro
cornstarch
peanut oil (or other oil for frying)
Directions
1. Peel the potatoes. Put them in a large pot, cover the potatoes with cold water. Bring to a boil. Season with salt. Cook until the potatoes are fork-tender, about 40 minutes. (Note: keep the potatoes whole, you want them to be as starchy as possible so they’ll hold their shape later).
2. Drain the potatoes, and mash them until all large lumps are gone. The potatoes can still be a little bit lumpy, they shouldn’t be totally smooth. Put them in the fridge until cold (I put them in the fridge overnight).
3. In a medium pan, heat olive oil. Add in the garlic and onion and cook until soft (5ish minutes).
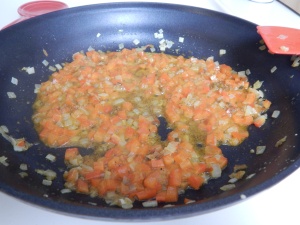
4. Add the red pepper and sofrito. Cook until the pepper has softened, about 5-7 minutes.
5. Add the ground beef. Break up with a spoon, and heat until cooked through.
6. Turn off the heat and stir in the cilantro.
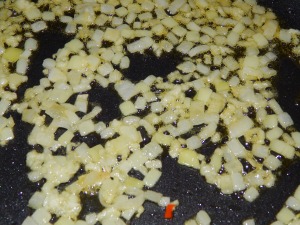
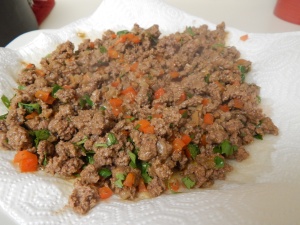
6. Once the beef is done, drain on a paper towel. Let it cool until it’s easy to hold in your hand (I stored it in the fridge overnight).
7. Add oil to the deep fryer and heat to 350°. Alternatively, if you’re using a pan heat an inch of oil until it’s very hot.
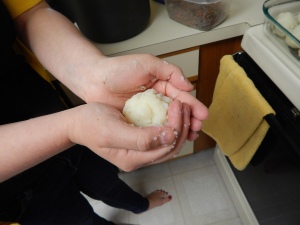
8. When the potatoes and beef are cold, it’s time to form the balls. Coat your hand with a thin layer of mashed potatoes. (I’ve read you can do this using an ice cream scoop, but I don’t have one so here is my method)
9. Put a spoonful of ground beef in the middle of your hand. Cup your hand to start forming a ball shape. Add additional mashed potatoes to close the ball.
10. Use your other hand to tighten the shape and create a tight ball.
10.5. This isn’t a real step, but I recommend putting the rellenos you aren’t actively cooking on a plate and in the fridge. Keep them cold so they won’t break before frying.
11. Put some cornstarch on a plate. Roll the rellenos in the cornstarch until completely covered.
12. Put the rellenos into the oil. Cook for 6 minutes (some areas will be a little brown).
13. Remove from heat and drain on a paper towel. Let cool a bit.
14. Serve and eat.
 Messy level: This is a highly messy recipe. The potatoes, beef, and rellenos are basically three separate recipes. The messiest part is making the rellenos because potatoes will get all over your hand. Cornstarch also gets everywhere and if you aren’t really careful and delicate the rellenos will fall apart. It’s very messy – but if you give yourself the time it’s a fun recipe to make.
The post Rellenos de Papa (Stuffed Potato Fritters) appeared first on Cooking is Messy.
]]>The post Pad Thai Inspired Noodles appeared first on Cooking is Messy.
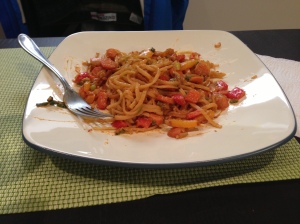
]]>But this recipe is awesome.
Seriously. It’s vegan and it’s awesome. And not only awesome, it’s quick and easy to make. It’s the kind of thing you can make when all you have is condiments and a few vegetables. This recipe comes from The Happy Herbivore Cookbook by Lindsay Nixon. She calls is “Cheater Pad Thai” because it’s so easy to make. As a warning, this recipe although delicious, doesn’t really taste like Pad Thai in a restaurant. It has Pad Thai flavors in it, but there’s something a little different about it. But, if you want a taste of Thai at home, this is a good recipe.
Also this is a recipe you can fool around with depending on what you have at home. You can alter the proportions of the sauce to your taste, and you can use whatever vegetables you think will taste best. I usually use carrots, onions, garlic, and bell pepper. I’ve also done peas, leafy greens, bean sprouts, and squash. If you need your meat, you can cook up pieces of chicken, shrimp, or beef and throw it in with the rest of the ingredients.
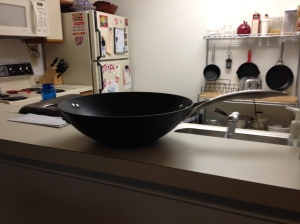 When it comes to stir fry, I like to use a wok. Now, prior to having a wok I thought it was something scary to use. That might be because I saw an episode of Top Chef once where the contestants had to cook Asian street food using a wok and some of them freaked out because they had never used one before. So I thought, if those professionals are scared of a wok, how can I use a wok? Ryan and I got it as a wedding present and we were really excited. I unpacked it and then did a whole lot of research. I watched YouTube videos and read a bunch of articles online.
Now I may be using the wok wrong, but I totally love it. What I learned (I think) was you’re 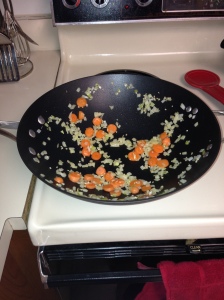 supposed to use a wok at very high heat, which then sears the vegetables, and then because of the shape of the pan it keeps the vegetables from getting too soft – so they are cooked but crunchy. Also you’re supposed to use your “aromatics” first to give the pan flavor. That means you saute things like onions, garlic, and ginger first – and then you add the vegetables based on crunchiness (so carrots before bell peppers). Also you’re supposed to stir constantly and move the vegetables around and up the sides of the pan. This helps cook them, make them crunchy, and give them good flavor. If you have a wok, try it out! A regular pan works well too. I like the wok because it’s spacious and I can swirl the veggies around without flinging anything out of the pan.
Ingredients for 2-3 servings:
1/3 to 1/2 box of rice noodles.
1/4 cup soy sauce
2 tbsp peanut butter
2 tbsp sweet red chili sauce
1/2 tsp garlic powder
1/2 tsp ground ginger
1/2 tsp hot sauce
1 cup (or as much or as little as you want) of chopped vegetables
Directions:
1. Cook rice noodles according to package instructions.
2. Stir fry vegetables until they are softened but still a bit crunchy.
3. Mix soy sauce, peanut butter, chili sauce, garlic powder, ginger, and hot sauce. Alter ingredients to taste. I like a little more peanut butter because it makes the sauce thicker
4. Once the vegetables are almost done, add the sauce to the wok. Mix the sauce and veggies together.
5. Add the noodles to the sauce and veggies. Mix until you’re satisfied. Serve and eat!
two sp
 Messy Level:
Low to Medium. The pan ends up being coated in sauce so it takes a good scrub. But, it doesn’t use that many pans, therefore dishes don’t take that long!
The post Pad Thai Inspired Noodles appeared first on Cooking is Messy.
]]>The post Tex-Mex Stuffed Peppers appeared first on Cooking is Messy.
]]>While I was cooking, what made me happy was Ryan got home and said “it smelled good in the hall and I was hoping it was my house.” Awesome! I was winning before he even tasted it. The only compliment better than that is that we both liked it after we ate 
Many of the recipes I try out and post on the blog I’ve gotten from a cookbook, but this is a Mariel original! It was inspired by some Google searching, a little bit by Eating with the Seasons which is a book from my farm share with Potomac Vegetable Farms, and by Ryan’s love for tex-mex food. So I got ideas from here and there, but overall it’s all mine. It might seem silly, but I feel like I’m becoming a “real” cook when I’m putting meals together based on my own ideas. Hope you enjoy the recipe! It’s a great new take on taco night.
Ingredients
3-4 red bell peppers (depending on size, I used 3 and had leftover meat)
1 lb ground turkey (could also use beef)
1-2 tbsp olive oil
1 small onion, chopped
1 tsp minced garlic
1/2 can of corn (or about 2 ears fresh)
optional: 1/4 cup of corn salsa from Trader Joe’s. It’s a little sweet and spicy and I love it!
1/2 packet of taco seasoning
1/4 cup of tomato sauce (I like a chunky sauce so tomatoes are in the mix)
1 cup of chicken broth
shredded cheddar cheese (to your taste)
Directions:
2. Cut the bell peppers in half. Clean out all the seeds and pith.
3. In a skillet on medium-high, heat the olive oil. When the oil is hot, saute the onion and garlic (about 2-4 minutes).
4. Add the turkey meat. Add the taco seasoning. Add the corn. Cook until mostly cooked through.
5. As you’re cooking the meat, add the tomato sauce if you sense the meat getting dry.
6. Add all of the tomato sauce and 1/2 cup of chicken broth to the meat.
7. Simmer the meat mixture for 3-5 minutes.
8. Optional: If you like the peppers extra cooked, wrap them in aluminum foil and roast them in the oven for 10 minutes before you stuff them.
9. Stuff the meat mixture into the pepper half. Put the stuffed peppers into a casserole or rimmed backing dish
10. Sprinkle the top with cheese.
11. Pour the remaining chicken broth in the bottom of your dish
12. Cover with aluminum foil and cook for 20-25. It’s read when everything is hot, pepper is softened, and cheese is melted.
 Messy Level: Low! This is basically a 2-dish cooking endeavor. I basically used a knife, cutting board, skillet, and casserole dish so there was very little that needed cleaning up afterward. The biggest mess is trying to neatly get the cooked stuffed peppers out of the dish once they are done. Not only a good meal, but Ryan didn’t have to go crazy doing the dishes afterward.
The post Tex-Mex Stuffed Peppers appeared first on Cooking is Messy.
]]>



![IMG_0423[1]](http://cookingismessy.files.wordpress.com/2014/07/img_04231.jpg?w=300)

