The post Rellenos de Papa (Stuffed Potato Fritters) appeared first on Cooking is Messy.
]]> I love kitchen gadgets and accessories. Unfortunately, not all of my gadgets will get moved to London – you know space concerns, different outlet plugs, and such. So I want to use my gadgets before I put them in storage. The deep fryer is number one on that list. (My friends have even asked if I’ll have a deep fryer party).
Anyway, I’ve made today’s recipe before but I thought the deep fryer would take it up a notch. This recipe is a Puerto Rican recipe that is essentially seasoned ground beef, covered in potatoes, formed in to a ball, and then deep fried. Over the years, Ryan and I have made this recipe about a half a dozen times with mixed success. It always tastes good, but often the balls fall apart either while being formed or while in the oil. I thought using the deep fryer would help ensure good taste and good looks.
The true key to success is patience and preparation. You cannot make this recipe when you get home from work and want dinner – time is necessary! The mashed potatoes have to be cold so they can hold their shape. It is also important that the beef is cool. The meat doesn’t have to be cold, but if the meat is hot they will heat the potatoes, and then you’re in trouble. The oil also has to be really hot, which is where the deep fryer comes in because it ensures a consistent temperature. You can totally do this recipe in a pan, but it’s harder to keep the heat high especially if you over crowd the pan.
Anyway, I am really happy with the way this recipe turned out. And, although this recipe is labor intensive, I had so much fun making it. I had dinner first, and then started cooking so I wasn’t hungry as I prepped the meat and potatoes. I was flow state cooking baby! I just let myself cook how I wanted, it was easy and fun. I didn’t use a recipe and I let myself enjoy the process. I made the potatoes and meat on one day, shaped the ingredients into balls the next, and then fried them. Everything worked out really well, I only wish I could make the potato layer thinner so there could be more meat. But, still a very delicious recipe. The rellenos held their circular shape, the outside was crunchy, and the inside was warm and flavorful.
Final note, I didn’t make a perfectly even amount of meat and potatoes. I made some potatoes and some beef and then formed rellenos until I ran out of one ingredient. If you have leftovers, I’m sure you can find other ways to reuse them. Enjoy!
Ingredients
2 1/2 pounds russet potatoes
1 lb ground beef
olive oil
1 small onion, diced
2 cloves garlic, minced
1 red bell pepper, diced
1/4 cup sofrito
2 tbsp cilantro
cornstarch
peanut oil (or other oil for frying)
Directions
1. Peel the potatoes. Put them in a large pot, cover the potatoes with cold water. Bring to a boil. Season with salt. Cook until the potatoes are fork-tender, about 40 minutes. (Note: keep the potatoes whole, you want them to be as starchy as possible so they’ll hold their shape later).
2. Drain the potatoes, and mash them until all large lumps are gone. The potatoes can still be a little bit lumpy, they shouldn’t be totally smooth. Put them in the fridge until cold (I put them in the fridge overnight).
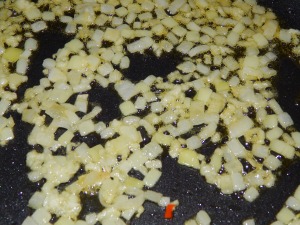
3. In a medium pan, heat olive oil. Add in the garlic and onion and cook until soft (5ish minutes).
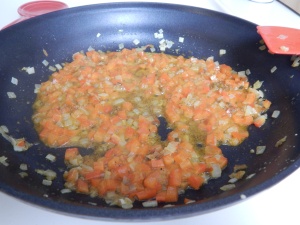
4. Add the red pepper and sofrito. Cook until the pepper has softened, about 5-7 minutes.
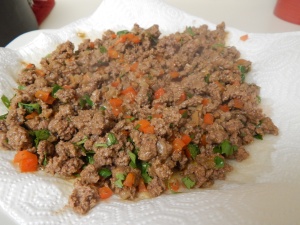
5. Add the ground beef. Break up with a spoon, and heat until cooked through.
6. Turn off the heat and stir in the cilantro.
6. Once the beef is done, drain on a paper towel. Let it cool until it’s easy to hold in your hand (I stored it in the fridge overnight).
7. Add oil to the deep fryer and heat to 350°. Alternatively, if you’re using a pan heat an inch of oil until it’s very hot.
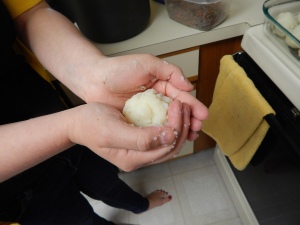
8. When the potatoes and beef are cold, it’s time to form the balls. Coat your hand with a thin layer of mashed potatoes. (I’ve read you can do this using an ice cream scoop, but I don’t have one so here is my method)
9. Put a spoonful of ground beef in the middle of your hand. Cup your hand to start forming a ball shape. Add additional mashed potatoes to close the ball.
10. Use your other hand to tighten the shape and create a tight ball.
10.5. This isn’t a real step, but I recommend putting the rellenos you aren’t actively cooking on a plate and in the fridge. Keep them cold so they won’t break before frying.
11. Put some cornstarch on a plate. Roll the rellenos in the cornstarch until completely covered.
12. Put the rellenos into the oil. Cook for 6 minutes (some areas will be a little brown).
13. Remove from heat and drain on a paper towel. Let cool a bit.
14. Serve and eat.
 Messy level: This is a highly messy recipe. The potatoes, beef, and rellenos are basically three separate recipes. The messiest part is making the rellenos because potatoes will get all over your hand. Cornstarch also gets everywhere and if you aren’t really careful and delicate the rellenos will fall apart. It’s very messy – but if you give yourself the time it’s a fun recipe to make.
The post Rellenos de Papa (Stuffed Potato Fritters) appeared first on Cooking is Messy.
]]>The post Mozzarella Sticks appeared first on Cooking is Messy.
]]>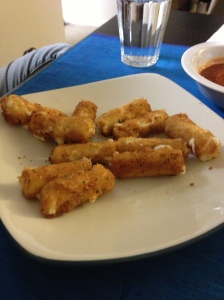 I feel guilty because I haven’t posted in awhile. Yes, there have been times when it’s taken me over a week to post, but usually it’s because I’m working on something and I have a recipe waiting in the wings.
Recently, I’ve had nothing! I’m in an inspirational drought. I don’t know what I want to cook next. My excuses are first, that I’m obsessed with the Momofuku Milk Bar cookbook, but I don’t want to just post a thousand cookie recipes from one book. And second, being a real working person is getting to me. Oh, I still cook throughout the week – but I’m trying to hone my 3-4 best after-work-doesn’t-take-that-long-meals. And when I do get those down, I’ll be sure to share. But I haven’t been making anything I find truly exciting.
So I’ve got cookers block. Is that a thing? Maybe. I think it’s like writer’s block, but instead I don’t know what to cook. If anyone has any suggestions of something for me to try I’d be happy to know it.
Until I come out of cookers block, here’s a delicious and simple recipe for homemade mozzarella sticks. I made them once and Ryan, our friends Shane and Anna, and I devoured them. They were so good and it didn’t even bother us that we basically downed a whole package of Polly-O string cheese. But, there’s not much that’s better than melty hot cheese and it’s football season again so this is a perfect snack for Sundays.
Ingredients:
Package of mozzarella cheese sticks (you could also definitely use balls, or cut discs from a log of cheese. You just need bite sized pieces)
2 Eggs
1/4 cup water
2/3 cup flour
1/3 cup cornstarch
1 1/2 cup Italian seasoning bread crumbs
Vegetable Oil
Directions:
1. Heat a deep fryer filled with vegetable oil to 350°. Or heat about 1 inch of oil in a skillet until it’s very hot.
2. Mix the flour and cornstarch in a separate bowl.
3. Beat the two eggs and water in a bowl.
4. In a third bowl, pour in the bread crumbs.
5. Take all of your cheese sticks and unwrap them. If you’re using Polly-O, then cut the sticks in half across the equator (so NOT long). If you’re using something else, just make sure you’ve got bite size strips, cubes, or balls.
6. Coat the cheese in the flour mixture, then in the egg mixture, then in the breadcrumbs.
7. Put in the hot oil. Fry until golden brown. It takes about 45 seconds. If you’re using a skillet, you may have to rotate them so all sides get brown.
8. Let drain either in the fry basket, or on some paper towels. 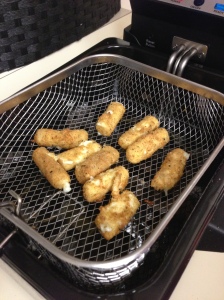
9. Eat it all immediately.
 Messy Level – Medium. This is medium because of all the dipping in different bowls. Your fingers will be coated just like the mozzarella sticks. And inevitably, there is flour, egg, and bread crumbs all over the counter. Also, if you’re using a deep fryer sometimes the cheese leaks out and gets stuck in the fry basket so clean up can be a pain. What’s great about this recipe is it’s quick and doesn’t require too many dishes.
The post Mozzarella Sticks appeared first on Cooking is Messy.
]]>The post Birthday Recap and FUNNEL CAKE appeared first on Cooking is Messy.
]]>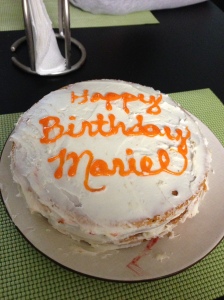 that’s right, funnel cake! Anyway, I’m someone who loves birthdays. I love making a fuss, hanging out with friends, celebrating a lot, and eating large amounts of sweets. And since I’m self involved and still want to talk about my birthday almost a week later, I want to share with you my adventures.
Growing up, birthdays were celebrated by opening presents and eating cake first thing in the morning before going to school/work. Naturally, I insisted that Ryan and I do the same. Ryan woke up all groggy and sleepy, but he did sing me happy birthday and shared a piece of cake with me. I made the cake myself: it was yellow cake with a strawberry raspberry filling and a lemon buttercream frosting. Ryan had volunteered to get me a cake, and even said he would make me a cake, but I decided I would have more fun making a cake. I was inspired by a cake we had at our wedding from Sweet Eats Cakes, that was just to die for. My cake wasn’t nearly as good as hers. The frosting and filling (both of which I made!) were yummy but I over-mixed the batter so the cake came out a bit dense. It was tasty, but I had the most fun putting it all together.
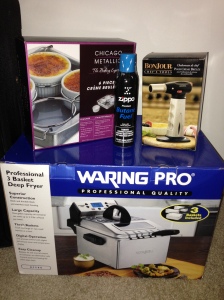
After cake I opened presents. Ryan got me a deep fryer! I was so excited because I had been talking about wanting one for about a year. Ryan let me register for one when we were engaged, but no one bought it, because, seriously who needs a deep fryer? It’s not a kitchen necessity, but I thought it would be super fun to have. I mean, who doesn’t want to have carnival themed dinner nights? Think of all the things you can make! Deep fried candy bars, fried chicken, corn dogs, French fries, potato chips, hush puppies, and of course funnel cake. P.S. Mom, please send me your fried chicken recipe!!! Hungry bellies want to try it!
And, to add to the kitchen goodness, my brother got me a crème brulee set, complete with kitchen torch and butane gas. So I now have two ends of the cooking spectrum – I now have the means to makee fancy food like crème brulee and greasy street food like corn dogs. My friend also pointed out that now I’ve moved up from basic appliances to the “dangerous” ones. Using the deep fryer I did have an accident, but not related to the fryer. I’ll get to that in a bit.
But back to the birthday. I went to work and I spent a lot of the day telling museum visitors it was my birthday. After that, my besties from work took me out to lunch at Lincoln, an Abraham Lincoln themed restaurant. It was such a decadent afternoon. The weather was gorgeous and we ate outside, sitting in this cozy both. Seriously, you never see a booth outside, but we were really sitting under a tree lounging on snuggly couches. We all ate so much! We shared brussels sprouts, fries, and chips. I had a lobster cob salad and it had HUGE chunks of lobster. My friends told the waiter it was my birthday and he asked if I was turning 16. Not quite.
For dessert we ordered some sweet potato pound cake thing, which sounded suspicious but was really yummy. There was this deliciously rich and decadent sauce we poured on top. The dessert was the only thing I took a picture of, with the exception of my mint julep, which was in a cool copper cup. The other pictures are courtesy of my lovely friend Anna. I did take about 7 pictures of Charlotte pouring the sauce on the cake. Also, they gave me a free chocolate cake too, so that put my birthday cake total up to 3. Actually, make that 4, because my coworker Jonathan bought be a cupcake too.
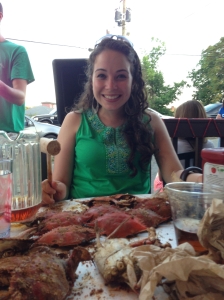
And, as if I hadn’t eaten enough, Ryan took me out for dinner at Quarter Deck. This was what I was most excited about, because we were going to have a steamed crab feast. I love crab picking and it’s truly a staple of summer for me. We got a table outside, ordered a pitcher of Yuengling and waited for our crabs to arrive. My goal was to eat 14 crabs (because it’s half my age). The restaurant gives you a bucket so you can put all your unwanted bits inside – but I laid out the crab tops as a marker to see how many I had eaten. I didn’t make my goal, I only ate 12.
I had the best time eating a leisurely dinner outside with Ryan. Some people don’t like crabs because they say it takes forever to get any food. And it does. But you can’t go for crabs really hungry. It’s most enjoyable when you go with the purpose of sharing the evening with someone. We had a few beers, enjoyed the weather, and talked, and got really messy and covered in Old Bay and crab bits.
I treated myself to a knife skills class at Sur la Table on Saturday. In addition to sushi class, knife skills class is something I’ve wanted to do for a long time. I have always been nervous to go though, because I thought I’d be the worst, and incapable of cutting well, and might slice my finger off. Someone did cut themselves in class, but it wasn’t me. Class was pretty cool! I learned a better way to cut a bell pepper, grapes, and an onion. I also learned how to hold the knife better (it’s called a pinch grip). And that instead of lifting my arm up and down to chop, I’m supposed to do more of a continuous rocking motion that follows the shape of the blade. I’m not yet ready to throw knives at a Japanese steak house, but my skills are improving.
When you take a class at Sur la Table you get a 10% off coupon that’s good for a week. I was walking around the store and I caught my eye on a semi-ugly pig pitcher. And I wanted it a lot, but it was $50. I love pigs, and since I was a kid I’ve collected random pig things. I have coasters, a wine stopper, and little figurines, but I could not justify buying a $50 pig pitcher. Ryan also told me it looked “like a demon.” So I consoled myself by buying a pig overmitt and a spatula. (And some other things… there was a sale, what was I to do?!)
On Sunday, I had three of my college friends, Norma, Lynn, and Kim, over for brunch. They live in Maryland, so I made them trek all the way across state lines for some food. I made an onion and pepper quiche – and I made the crust, from scratch. I also made waffles, bacon, Bloody Mary’s, and I put out a bunch of berries. It was delicious, I got to practice my knife skills, and my friends all teased me that the strawberries looked especially well cut. And, I made all this delicious food, and I didn’t take a picture of one flipping thing. The only picture I took was of my friends on the roof of my building with the Washington Monument in the background.
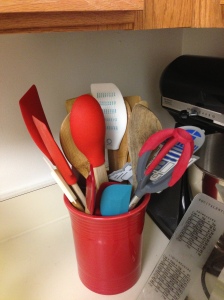
Also, I’m not sure how it started, but somehow Ryan started giving a speech about how I have too many different kinds of spatulas. I think it was because I was showing my friend Kim my Sur la Table purchases. She is a good and adventurous cook herself, so I thought she’d be interested. But somehow, the spatula situation got out of hand and my friends started calling us “House of Spatula.” They said I should rename my blog “House of Spatula.” Or maybe have a food truck called “House of Spatula.” Only Kim said it made sense to have so many so I didn’t always have to wash them. And now I feel like every time I cook I should use multiple spatulas to prove that I need so many. My weak argument is that when you see the kitchens of professional cooks they always have tons of utensils and spatulas. The group pointed out that I don’t cook as much as they do. Sure, but you know how they say dress for the job you want, not the job you have? Maybe it’s like that. If I equip my kitchen like a professional chef, maybe I’ll cook like one.
So that was my birthday. It was delicious. And I think 28 is going to be all right because it includes funnel cakes.
I settled on funnel cake as our first deep frying expedition because it’s a delicious treat. But also, it’s low pressure. I didn’t want to start with dinner because what if it was ruined and we are starving after work and then have nothing to eat?! Also, we had practically all the ingredients in the apartment already. And again, funnel cake is delicious.
Funnel cake is also fun. We have it at the fair, at the circus, at the baseball game. There’s just something festive about it. As Ryan and I were making it together, we were silly and dancing and having a nice time. We did have one minor setback that I thought was going to ruin the night. As he was stirring ingredients, I went to put stuff back on the shelves. I placed the flour on the shelf and a can rolled off and hit me in the foot. I yelled in pain, fell on the floor, and cried in a heap. Seriously, I was behaving like a pathetic mess. We were worried I’d lost my nail since that happened to me last year. But I didn’t, so crisis averted. Once we got me off the floor and cleaned up the blood on my foot, we rallied and were back in business. We finished mixing the dough, poured it into the hot oil, and watch with delight as we made our first funnel cakes. We also had our friend Josh over and there was immediate talk about the three of us opening a stand and selling funnel cakes to tourists on the 4th of July.
This recipe is half of the Williams-Sonoma recipe. It makes about 4 funnel cakes if you use ½ cup of batter per cake. Also, if you don’t have a deep fryer, you can still make this recipe. What you’ll need is a deep skillet or a not-too-deep pot. Maybe like a Dutch oven. Fill it with a few inches of oil and heat until very hot. You can use a candy thermometer to try to make the exact temperature. You just want a few inches of oil so the funnel cake has room to float.
Ingredients
Canola oil for frying
¼ cup of confectioners’ sugar
¾ tsp cinnamon
2 cups all-purpose flour
1 ½ tsp baking powder
½ cup packed brown sugar
Scant ½ tsp salt (scant means don’t fill the tsp all the way)
1 egg and 1 egg yolk, lightly beaten
1 ½ cups milk (might need a bit more)
¾ tsp vanilla extract
Directions
- Mix confectioners’ sugar and cinnamon together in a small bowl. Set aside, this is a topping.
- Optional: Heat oven to 200°. This is so you can keep funnel cakes warm while you’re still working on making new ones.
- Pour oil into deep fryer. You will use what feels like a disgusting amount, but it’s ok because you can strain it and reuse it.
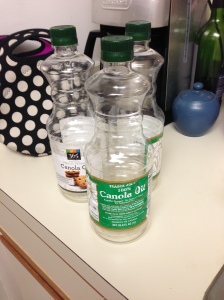
- Heat deep fryer to 375°.
- In a large bowl mix together flour, baking powder, salt, and brown sugar.
- In a medium bowl, mix egg, 1 ½ cups of milk, and vanilla.
- Add wet ingredient to the dry. If it seems a little thick and will be hard to pour, add some more milk. You shouldn’t have to add anymore than another ½ cup. I think we added another 2 tbsps.
- Put fry basket into the oil.
- Transfer batter to a cup with a spout. We used a liquid measuring cup. If you have a funnel, use that! What you want is to be able to pour the batter in ribbons so it makes the funnel cake shape. If it pours in one big blob, it’s not going to look right. Also, it might be obvious, but if you have a funnel, then just pour the batter through the funnel into the oil. I don’t have a funnel, so I needed a cup with a spout.
- Slowly pour ½ cup of the batter into the hot oil in a thin stream. Try to make a circular pattern. Make sure the batter is poured within the confines of the fry basket.
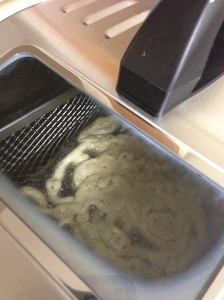
- Fry for about 1-1 ½ minutes, until the underside is brown.
- Flip the funnel cake over. We raised the frying basket out of the oil, then flipped the funnel cake, then dropped the basket back into the oil.
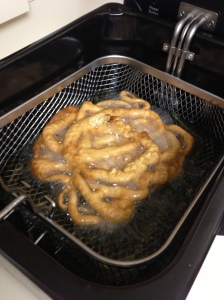
- Fry for 1 minute more.
- Lift the basket out of the oil and let drain. If ready to eat, sprinkle with the sugar mixture. If saving, put in the oven to stay warm.
- EAT IT!!!
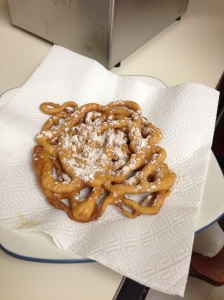
Messy level
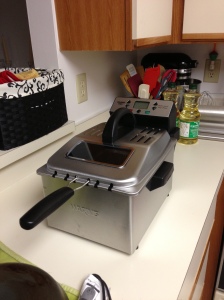
 Low! I’m totally impressed with this deep fryer. The max-fill oil level is much lower than the rim of the fryer so there is no spatter at all. The only mess we made was when we transferred batter from the mixing bowl to the measuring glass. It was really excellent. We didn’t even have to worry about draining the funnel cakes because the basket hangs over the oil and lets it drip there. SO EASY. I love it. I look forward to more frying.
The messy part came from smashing my toe with a can of coconut cream. Be careful!
Update 6/30 – So, I think I should up the messy level to 3 spoons. Cooking it isn’t very hard, but man is clean up some work!!! You have to clean the heating unit, the part with the oil, and the frying basket. Also, if you’re going to reuse the oil, you have to pour it through a strainer into a large jar. And so it’s a lot of steps and a lot of things to clean up afterward.
The post Birthday Recap and FUNNEL CAKE appeared first on Cooking is Messy.
]]>The post Puerto Rican Arepas – Part 1 appeared first on Cooking is Messy.
]]>Something you might not know about me is that I have two part time jobs. I’m lucky because both are great. The are fun, intellectually stimulating, and I get to run around and don’t have to sit behind a desk. I also have flexible hours so sometimes I get home really early, and sometimes I sleep in late. But, the downside of this is that I often work on the weekends resulting in a 6-day work week and a 1-day weekend. So, imagine my great surprise and delight when my bosses and lady luck smiled down on me and gave me ALL of Memorial Day weekend off. That’s three days off! IN. A. ROW. It was greatness. And it gave me a lot of time to play in the kitchen. I made a spicy carrot and beef tagine, lemon squares, strawberry sorbet, pizza, cookies, and arepas.
Arepas are fried dough, and Ryan and I liken them to Puerto Rican latkes. Other Latin American places besides Puerto Rico have latkes, but we’re focusing on my family’s recipe today so we’re calling them Puerto Rican. I’ve been researching how to make arepas for almost a month, and the long weekend gave me the chance to final dive in and make them.
Let me say, before we get in too deep, that for me, this is a recipe in progress. Think of it as “Arepas 1.0.” The recipe I’m going to give you is a complete recipe that you can make and enjoy. But my quest isn’t done, because I’m trying to channel the arepas recipe that my grandmother used to make. My grandmother passed away a number of years ago, so while this recipe is delicious and works well, it’s not exactly the way I remember. So I’m going to continue tinkering and testing, and will update accordingly. I’m working on memories and tradition, and so maybe my nostalgia is un-achievable, but I’m having fun trying. Now, before we get into the recipe, let me back up and tell you about why trying this is so important to me.
I started cooking regularly, and with interest, about 2 1/2 years ago when I moved to New York. Before that I “cooked” in that I could make pasta, cook a chicken breast in a skillet, and heat a box of rice. But I didn’t know how to make anything that was a little bit special. When I moved to New York I wanted to try my hand at cooking because it was the first time I was living alone in a non-collegey atmosphere. Also, New York is expensive so cooking at home would be cheaper, and my apartment was only a few blocks from the Union Square Farmer’s Market, which is year round and has a huge variety.
But, also I started cooking, because I’m a little crazy. I was living in a new place, and when I thought about what felt like home, a lot of memories had to do with my favorite meals. And then I had a realization that I didn’t know how to cook anything that my future family might like, ask for, or long for. Now, I was a single girl (to be clear I was dating Ryan, so I was single in the government forms check box sense of the word) in New York, but I was worrying about the needs of my future family. A husband I didn’t yet have, and children that were non-existent. I was twenty-five, and crazily worrying about feeding future people.
So I started to learn how to cook. And in lieu of family, I fed classmates and friends. But all that prep paid off! I’m now happy to say that me and Ryan, my little family of two, has a few go-to recipes. There are meals now that Ryan requests or is happy to see when he gets home. Now that I have some of my own recipes, I’ve become interested in tackling some of my family’s existing recipes. Some recipes I’ve made, like my mom’s apple pie or the arroz con gandules that Titi Lisa (Aunt Lisa) brings to Thanksgiving every year. And some I haven’t gotten to yet, like Papa’s breakfast cornmeal.
But arepas have becomes especially important in part because they come from a potentially a lost recipe. As far as I know, when my Abuela (grandmother) passed away, no one knew her arepa recipe exactly. Her arepas were crispy, airy, and delicious. They were perfect for stuffing with rice and beans or eating solo and dipping them in the bean sauces. We only had arepas if we were visiting her, or if she sent some pre-made dough back home with us. They were somewhat special because we didn’t have them all the time. But mostly, they were so tasty. I would easily wolf down 3 or 4 in a sitting.
Now it’s funny that I covet this recipe so heavily because my abuela wasn’t known for her cooking. Her arepas were amazing, her rice and beans were good, and everything else was… not good. I liked going to her house because she had grape soda, which I had never seen anywhere else. And she bought us fried chicken buckets from KFC, which also wasn’t something I had at home. And for dessert she’d give us those little cups of ice cream, half chocolate and half vanilla, with a little wooden spoon. But she didn’t really cook and even heating things up didn’t always go well. I remember an Eggo waffle that was hot on the outside but rock hard on the inside. Eric, my brother, and I sawed at them until Papa gently suggested that maybe we should eat something else.
Most importantly though, my abuela was awesome. She was the first person I knew who lived in an apartment, and didn’t have a car, and walked everywhere. I thought that was cool, and scary, and unusual, but amazing. I’m totally convinced to this day that she could have wrestled a bear and won, because she was strong and had such a fierce personality. She liked to crochet and made pretty dolls and covers for tissue boxes. But she was also into WWE wrestling, following the story lines closely. Each time we visited she gave us gift bags full of fun goodies she bought at the dollar store. Things like puzzle books, pens that you can click to change the ink color, and crazy socks. And looking back now, I think she filled her home with things that just made her happy – no matter how silly. She wore sparkly shoelaces in her sneakers, she had a fake bearskin rug – complete with bear head, and she had a sign in her bathroom that said “if you sprinkle when you tinkle, be a sweetie and wipe the seatie.” She had a print of Picasso’s Femme, which is basically a few lines that make a picture of a butt. I thought it was hilarious and awesome. She was loving, quirky, and passionate and it was fun to visit her.
So, I feel like by making her arepas it’s a nice way to cherish her warm, quirky, and unique memory. By doing this, I can feel close to her and remember all the lovely things about her.
Also, not only does this recipe make me feel closer to my grandmother, it’s brought me to my parents and my aunt. In preparation for this I reached out to my Titi Mari for advice, and she provided me with the recipe below. I also asked Papa what he remembered about the arepas. Then I made my first batch and sent my mom a picture with no information except, “looks good right?” She called me almost immediately exclaiming, “are those AREPAS?!” And so we had a nice talk about what had worked well and what I could do next.
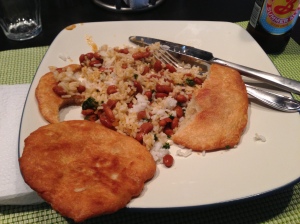
And my arepas came out pretty darn good. We each ate two the first day. And I’ve been having them for lunch at work, greedily scooping up beans and rice and wishing I had brought more. I find myself budgeting the arepas so I have at least a few bites saved for the end of the meal. They tasted crispy and golden, with some doughy parts, just like I remembered. But they weren’t airy with pockets for beans. So I will push on and try again.
I hope you think of trying this recipe. Or, better yet, what’s a meal you love from your childhood? What gives you a happy memory? Whatever that is, I think that’s a recipe you should try. Hopefully we all have a happy food memory. So why not try and recreate it?
Ingredients:
1/2 lb all purpose flour
2 oz lard
8 oz salted water (salted to your taste, I used 2 tsp and Ryan said it could use more)
Now, when I read this recipe from my aunt I said to myself, “lard?!” Lard can definitely make things delicious but it’s not popular any more. It’s texture’s a bit weird in the tub, it’s high in calories, and the fact that it’s pig fat (yeah, if you didn’t know, lard is pig fat) is a little off putting when you think about making pies or other meals. But I was going to try my damnedest to do it like my abuela, so I went on a quest for lard.
I usually show at Trader Joe’s, and they didn’t have lard. I then walked to Whole Foods thinking that foodies shop there and so might need lard, even though it goes against the healthy vibe. I had read that lard can be hard to find so I searched in the butter section, the baking section, the ethnic food section, and then finally to the meat counter. I went to the meat counter and had this conversation:
Me: Do you have lard?
Lady at the Counter: What?
Me: Lard? (In my head: sigh, if she doesn’t know what lard is I’ll never find it!)
Lady at the Counter gave me a confused face
Second Lady at the Counter jumped in and said she’d help me. She took me to the shortening, which she said I could use as a substitute. It was on the bottom shelf below all the cooking oils. I was feeling a little deflated and I called Papa to confirm that I could use shortening. He said yes, he had seen his mom do that. So that’s what I used. But I’m told lard is the best and can make the arepas more flaky. Next time I’ll do more searching and find lard. If you don’t want to use lard, use shortening or butter.
Instructions:
1. In a small bowl mix the water and salt. Stir to help the salt dissolve.
2. Put the flour in a medium bowl. Cut in the lard/shortening/butter.
3. Pour a little bit of the water (I did 2 tbsp at a time) into the flour. Mix with your hands. You want to add water until you have a dough that does not stick to your hands. You may not need all 8oz of water. If the dough gets too wet, add a little flour to dry it out.
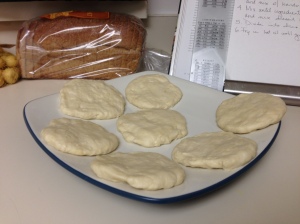
4. Form discs with the dough. I made about 8 discs and they were about 1/2 inch thick. Put them on a plate, not touching each other. Let sit for 30 minutes.
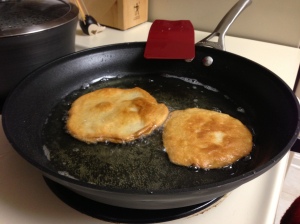
5. Pour a thick layer of vegetable oil in a deep skillet. You’re deep frying, so pour as much oil as you’re comfortable with. Heat on medium to medium-high. Your oil is hot enough when a.) you flick water at it and it pops and bubbles or b.) you put a little of bread in the oil and it floats, not sinks.
6. Fry the arepas in the oil, flipping occasionally, until both sides are golden brown. If you’re nervous about frying oil, I totally get it. Oil can pop and splash up and even one little fleck can hurt a bit. To avoid lots of splatter when you put in the arepas, here’s a tip: use the side of the pan as a slide. Gently nudge the dough disk over the side of the pan and down the edges. It will slide in nicely to the oil.
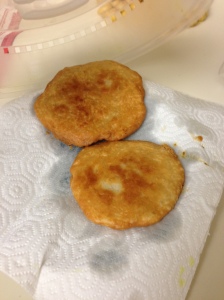
7. Once cooked, put arepas on a paper towel to drain off excess oil.
8. Serve with rice and beans! Or even, eat it alone. I knew I was on the right track to making my abuela’s recipe when I was ravenously eating the arepas alone and wishing I had more to scarf down.
Messy Level:
At the suggestion of my friend Charlotte, the new feature for Cooking is Messy is the “messy meter,” to help show how messy these recipes are. The scale is measured in dirty spoons, with one dirty spoon being low level messy, and five dirty spoons being high level messy. Hope you enjoy the new messy meter!
![]() I’m going to call this medium. It’s messy first because you have to put your hands in and work the dough. If you over water the dough it gets really soupy, sticky, and sort of nasty on your hands. Also, oil is just a bit messy to clean up. It pops and splatters so you have oil on your stove top and on your apron (yeah I wear an apron). Also, cleaning up oil just takes a bit of work. However, you only need one bowl, one pot, and a spatula to make this recipe so the clean up really is minimal.
I’m going to call this medium. It’s messy first because you have to put your hands in and work the dough. If you over water the dough it gets really soupy, sticky, and sort of nasty on your hands. Also, oil is just a bit messy to clean up. It pops and splatters so you have oil on your stove top and on your apron (yeah I wear an apron). Also, cleaning up oil just takes a bit of work. However, you only need one bowl, one pot, and a spatula to make this recipe so the clean up really is minimal.
The post Puerto Rican Arepas – Part 1 appeared first on Cooking is Messy.
]]>