The post Peanut Butter Chocolate Pretzel Cookies appeared first on Cooking is Messy.
]]>
Back in March, before I went back to DC for my friend Mala’s wedding, I asked Mala if she would get me the largest jar of peanut butter she could find. I asked her in part because my friend Sarah had been impressed by the size of the peanut butter in my cupboard and I told her it was nothing compared to what I could get in the US. Also I asked because Ryan and I wanted some US peanut butter. You know, tastes like home and childhood.
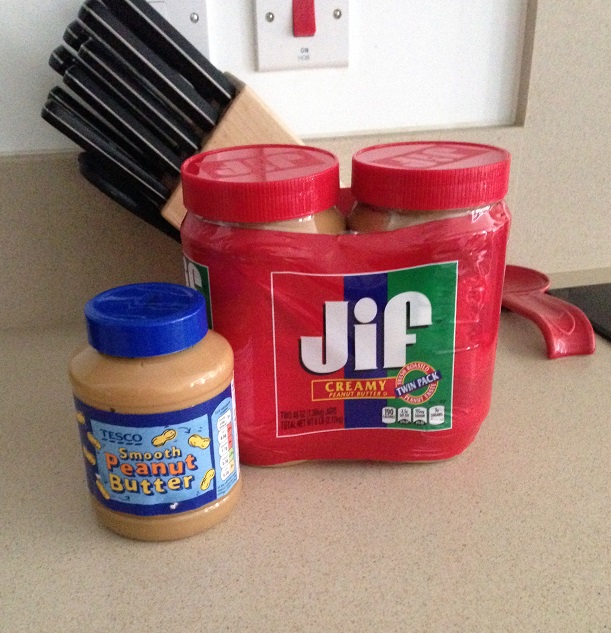 Mala went to Costco to get me the peanut butter, but in classic oversize American warehouse style she couldn’t just get one jar – she got a two pack. Look how big and gigantic those American jars are compared to what I bought at Tesco?! It’s astounding and overwhelming. I was worried they wouldn’t fit in my suitcase, although thankfully both made it back to London. Now it’s June and we’ve gone through one of those jars. Whether that’s impressive in a good way or a bad way I don’t know, but it’s the truth.
Since March, we’ve been generously eating peanut butter. We’ve had lots of pb&j sandwiches, we’ve put it on apples, and spread it on crepes with Nutella. Then the other day at work I had a craving for the flourless peanut butter cookies I wrote about when we first moved here. It was a controversial choice since it requires one cup of peanut butter – and since we’re on to the second jar it would put a significant dent in our inventory.
However, I kept day dreaming about those cookies. I had to make them. And then day dreaming turned to innovation. I thought, “you know what I love with peanut butter? Pretzels!” Pretzels with peanut butter. It’s probably my favorite snack to have after work. Sometimes right after work and before dinner gets started Ryan and I are famished and need a snack. Pretzels and peanut butter is perfect because it’s filling and the perfect combination of smooth and crunchy.
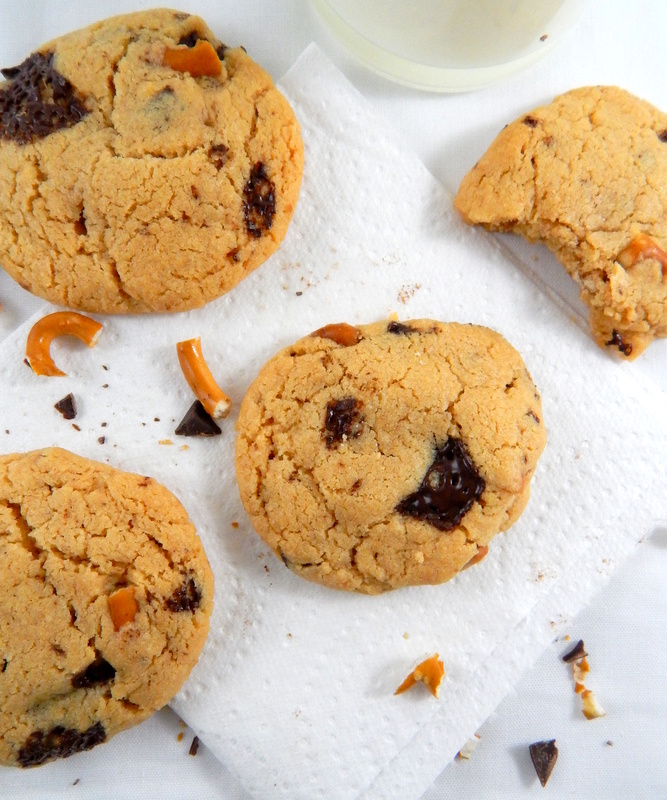
Then I my day dreaming got even better and I got extra snacky. What makes everything better? And what’s delicious with pretzels? Chocolate! There it was – the trifecta – peanut butter pretzel chocolate cookies. It might be my perfect sweet snack food. The pretzels had crunch and some salt, the dark chocolate is sweet and slightly bitter, and peanut butter is perfection. Most importantly, even with those addition this recipe is crazy easy because you need hardly any other ingredients. I just adapted the flourless cookie recipe to incorporate these add-ins.
I decide to use dark chocolate from a bar because I like the randomness in sizes and it melts really well. I’ve done it with chocolate chips and they work just fine. However, chocolate chips have more stabilizers in them, so even when baked the chips hold their shape. Chocolate cut roughly from the bar creates melty gooey-ness when the cookies come straight from the oven. Use whichever you like, either will be delicious.
 Messy level: Everything is made in one bowl! It’s the cleanest recipe and so easy to make. Yes, peanut butter is sticky but it stays in the bowl. And flourless means that the flour doesn’t spill on the floor or fly in the air. So clean people! One tip though, grease your measuring cup with cooking spray before measuring the peanut butter. Do that, and the peanut butter will slide out easily.
- 1 cup smooth peanut butter
- 1 cup sugar
- 1 egg
- 1 tablespoon vanilla extract
- ¼-1/3 cup crushed hard pretzels
- ¼ cup dark chocolate chips or chunks
- Preheat oven to 350°F/180°C.
- Line baking sheets with parchment paper.
- In a medium bowl mix together the peanut butter, sugar, egg, and vanilla extract until smooth and combined.
- Stir in the crushed pretzels and dark chocolate until mix throughout
- Take about 1-2 tablespoons of dough and form into a ball. Put the ball on the prepared baking sheet. Then, flatten the ball slightly.
- Bake in the oven for 10-13 minutes or until just slightly darker on the edge.
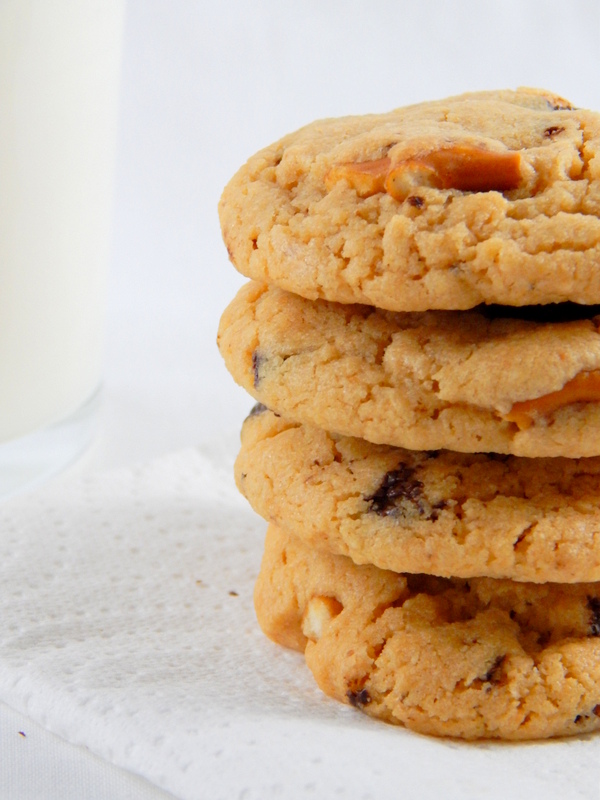
- Let cool. Then serve, preferably with milk.
The post Peanut Butter Chocolate Pretzel Cookies appeared first on Cooking is Messy.
]]>The post Tottenham Cake appeared first on Cooking is Messy.
]]>
Since returning back to London from the holidays in Colorado and Connecticut, I’ve been on a bit of a healthy eating kick. I would say I’ve been doing a good job – in part because when my groceries were delivered, the guy said, “you ordered a lot of vegetables.” So if he’s impressed with the amount of veg I’ve been eating, I must be eating a lot. But even so, I just can’t resist desserts because they are my favorite thing to eat and make.
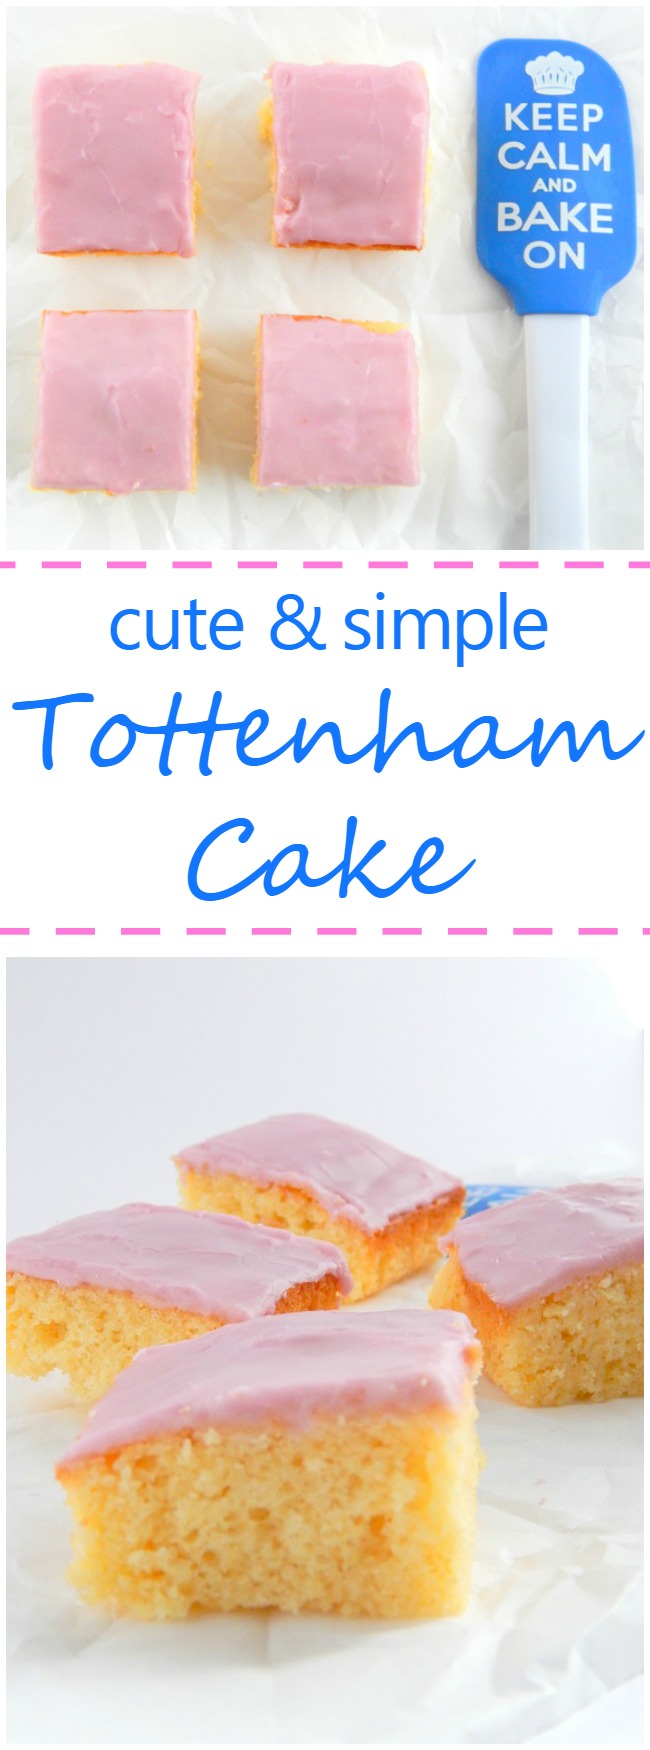
While I was in the US my DVR recorded all of season 4 of the Great British Bake Off. That means when I got home, I indulged in watching so many beautiful cakes, pies, cookies, being made. The show always inspires me to get in the kitchen and bake. One of the things I like best about Bake Off is the segment they do on historical and traditional British baked goods. I was particularly won over by the bit they did on Tottenham Cake.
This cake was invented by Quakers who lived in Tottenham, in north London. One of the dorkiest things I might ever say, is that I’m in to Quakers. Growing up I went to a Friends School (a Quaker school) for 11 years. I’m not a Quaker, I’m not even religious, but the experience has stuck with me. As a kid, sitting in silence during Meeting (the Quaker religious ceremony) was really challenging, but as a teenager stressed about friends, boys, and college it was nice to have a place for quiet reflection. Quakers also value simplicity and equality. I find that simplicity has stuck with me somewhat when it comes to my wardrobe. In school the dress code meant to reflect simplicity, and didn’t allow us to wear a number of things, but what I remember most is that we couldn’t wear shirts with pictures on the front or crazy patterns. To this day, the majority of my shirts are solid colored. I have a Star Wars shirts and a few Washington Nationals shirts, but beyond that I always shop for solids.
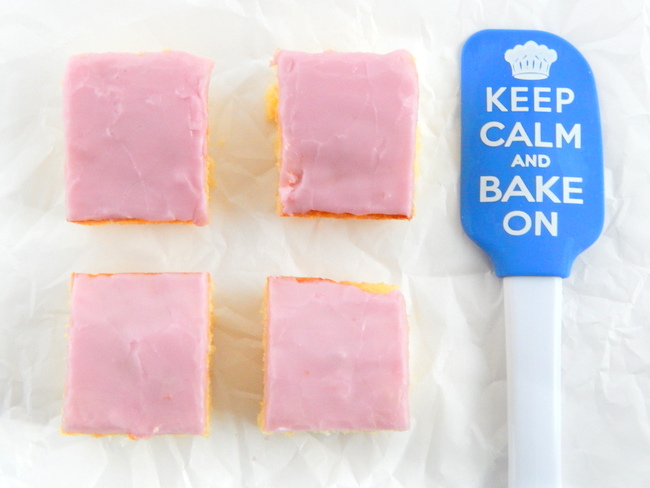
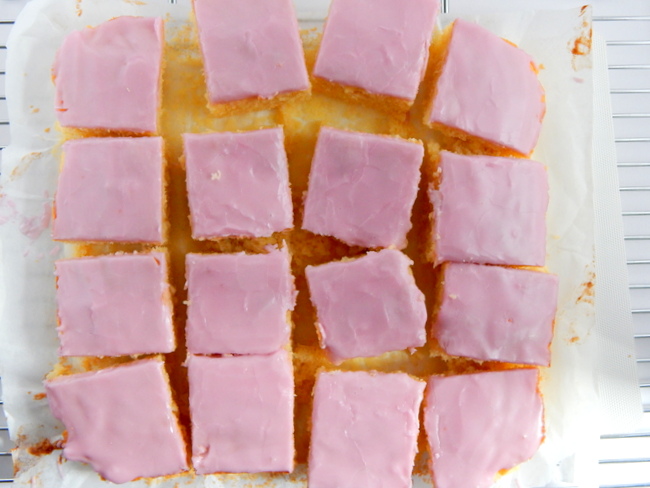
Anyway, I have a soft spot for Quakerism. In some ways, Tottenham cake reflects Quaker values of simplicity and equality. The cake requires just five ingredients to make and the icing needs only two. It’s a really straightforward recipe with ingredients that everyone has. Also, it is meant to show equality. As a tray bake it is easy to cut up lots of pieces so everyone can have one. Originally, the bakers sold this cake for 1 penny and off-cuts for half that. The cake would have been available to pretty much anyone.
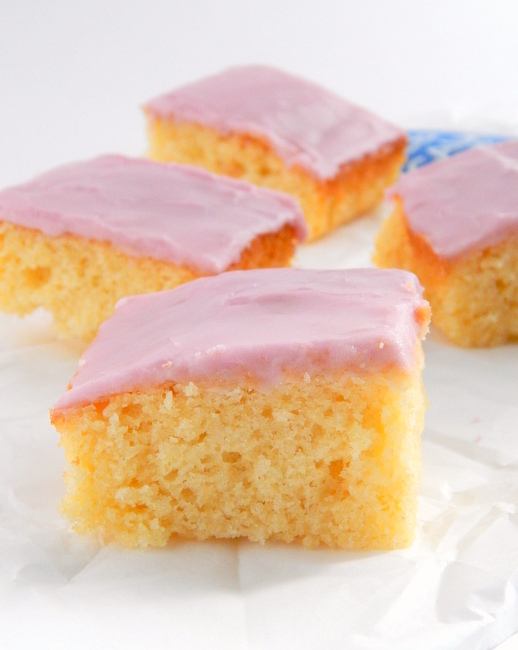
The pink icing is what makes Tottenham cake. Originally the pink was made from mulberries that were picked just outside the bakery. I’m not sure I’ve ever even seen a mulberry, or mulberry juice, so today people use pink food coloring or black currant juice. I found black currant juice easily here in the UK, but in the US I’m not sure that would be so easy. I bet you could use any similar dark red colored juice if you want that hint of berry flavor.
If you’re like me and thinking of breaking your health kick, then this cake might be right for you. It’s easy to make and will give your sugar fix. Then, it’s perfect to take around to friends or coworkers so you don’t eat it all yourself.
Adapted, just slightly, from Bake With Me Blog.
 Messy level: Two spoons. I think most cakes are three spoon recipes at least because you ordinarily need two bowls and there’s so much flour that gets everywhere! For this, you’ll need two bowls, one for the cake and one of the icing, and your baking tray. Easy! Also the icing isn’t too messy because you’re only doing the top of the cake.
- 6 oz/150g/12 tablespoons of softened unsalted butter
- 6 oz/150g/ ¾ cup caster sugar (in the US just use granulated)
- 6 oz/150g/ 1½ cups self-rising flour
- 3 eggs
- ½ teaspoon vanilla extract
- 5oz/125g/1 heaping cup confectioners sugar
- 30 ml/ 5 teaspoons, water/black currant juice
- pink food coloring (only needed if you use water instead of juice)
- Pre-heat oven to 350º/180ºC.
- Line an 8"x8" square tin with parchment paper, then grease that with a bit of butter.
- In a large bowl, using an electric mixer on high, cream together the butter and sugar until it becomes a light and fluffy. This takes about 2 minutes, but you may need to clear your beaters intermittently to make sure everything gets mixed.
- Add the vanilla extract to the butter mixture. Mix until combined.
- Turn your mixer to low or medium-low and beat in the eggs, one at a time.
- Once the eggs are mixed, turn the mixer to low and add in the flour all at once. Mix until just combined. It's ok if you have a few lumps!
- Pour the batter into your prepared tin. Bake in the middle of the oven for 25-30 minutes. The cake is done with you can insert a toothpick and it comes out clean.
- Let the cake cool.
- While the cake is cooling prepare the icing. In a medium bowl, add the confectioners sugar. One teaspoon at a time add the blackcurrant juice or water and just a bit of food coloring. Mix in between each teaspoon. Keep adding liquid until your icing looks like proper frosting and is thick enough to spread but not so thick it would rip up the cake when you spread it on. (Note: you may not need all the liquid or you may need more, just mix until it feels right to you. If it gets to drippy, then add more sugar)
- Let the icing sit for a minute it will harden and get shiny.
- Cut the cake into squares and serve.
The post Tottenham Cake appeared first on Cooking is Messy.
]]>The post Coquito (Puerto Rican Egg Nog) appeared first on Cooking is Messy.
]]>
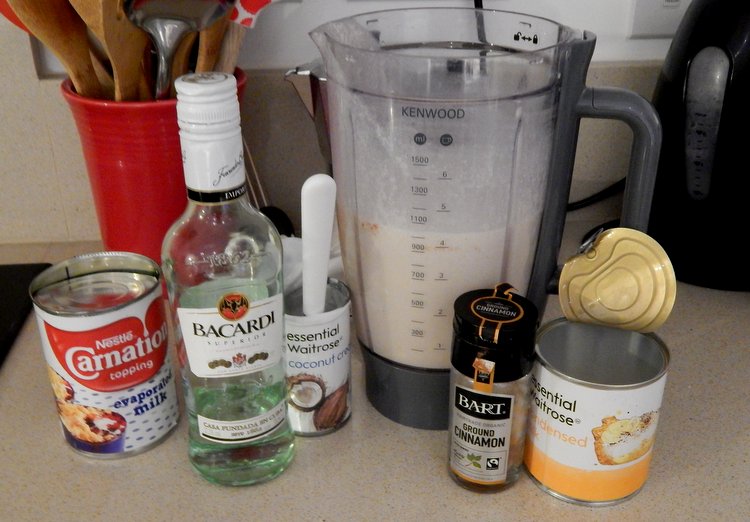
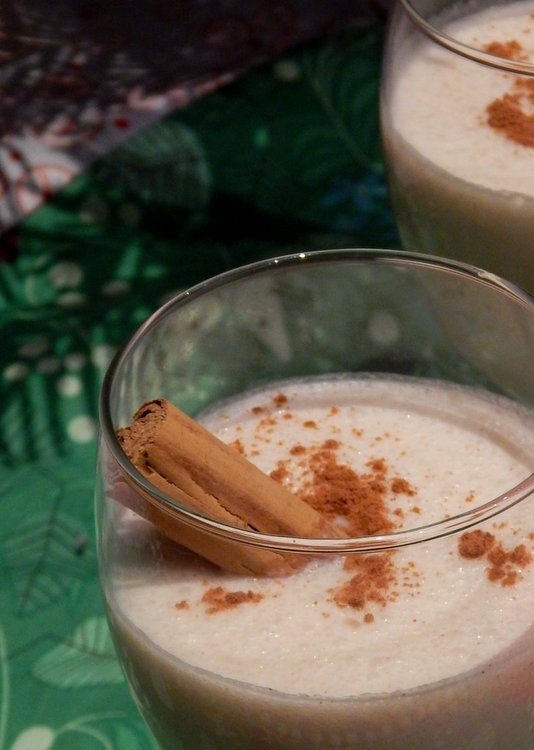
Coquito is basically a Puerto Rican version of egg nog, although the recipe I use, and many others I’ve found, don’t include eggs. What makes the recipe Puerto Rican is the coconut and the rum. It’s great because coquito is creamy and flavored with cinnamon, like many holiday treats, but it also evokes the memories of warm weather and summer cocktails.
My memories of coquito are closely tied with my Uncle José and Titi Lisa because they always bring it with them for Christmas. Yesterday, my aunt posted a photo from my parents house of her preparing to make coquito (my own prep picture is below). For me, that’s a clear sign it is almost Christmas – family is getting together and treats are being prepared.
Coquito is such an important part of Latino Christmas that El Museo del Barrio in New York City has an annual coquito tasting contest every year. How cool is that?! What have I been doing with my life that I’ve never tried to go to this?! One day I will have to remedy this oversight.
Coquito is a recipe, that for me, you don’t have to get crazy about the exact proportions of the ingredients. I found tons of recipes with different amounts of cinnamon, that use a double boiler, or use coconut milk instead of coconut cream. I suggest try it out my way, then play with the recipe until you find the flavor combination you like.
Even though, I think it’s totally fine to play with the recipe, I do have a few tasting notes. Straight out of the blender coquito is frothy and light, but room temperature. Feel free to chill it, but then the ingredients will separate and you’ll need to give it a good shake before serving again. In the future, I want to experiment with using egg whites and xanthan gum (I know not very traditional but it’s what Starbucks uses in frappuccinos) to see if I can make the perfect coquito that doesn’t separate – and then maybe I’ll be ready for the taste-testing competition. Also, you don’t have to add rum but I recommend it because it cuts back some of the sweetness – and also during the hoildays you should totally celebrate with a cocktail. If you’re definitely going to make a non-alcholic batch I suggest cutting back on the sweetened condensed milk and then you’ll have a subtler flavor.
Interested in other Puerto Rican foods for the holiday season? I’ve got a few suggestions including recipes for arepas, flan, and arroz con gandules.
Messy level: One spoon. There is nothing easier than opening can and blending it all in the blender.
- 1 15 oz can coconut cream
- 1 15 oz can coconut milk
- 1 13 oz can evaporated milk
- 1 13 oz can sweetened condensed milk
- pinch of salt
- ¾ tsp ground cinnamon (more or less to your taste)
- 1 tsp vanilla extract (more or less to your taste)
- pinch of nutmeg (optional)
- white rum (optional, but highly recommended)
- Add all ingredients, except the rum, to a blender.
- Mix until frothy and you can see the cinnamon is dotted throughout and not concentrated into any one area.
- Add the rum a little bit at a time, blend, taste, then adjust until it is too your liking. I would start with ¾ cup then work your way up from there.
- Chill if you like. Then serve garnished with a sprinkle of cinnamon or a cinnamon stick.
The post Coquito (Puerto Rican Egg Nog) appeared first on Cooking is Messy.
]]>The post Chocolate Smores Cake appeared first on Cooking is Messy.
]]>
Checkout woman (in reference to marshmallow fluff): What do you do with this? Put it on toast? I bought some and I don’t know how to use it.
Me: I’m going to use it for a cake. But, it’s good with a spoon straight from the jar.
Checkout woman says nothing and gives me weird look.
Me: You could also use it to make something like a smore with a digestive biscuit and piece of chocolate.
Checkout woman: Healthy.
And then I felt awkward like I had said something wildly inappropriate (and super American). But here’s the cultural difference part. Her go-to idea for marshmallow fluff was to put it on toast, and that is pretty English. Cheesy toast, beans on toast, boiled egg and soldiers – these are all ways the English use toast. I don’t have that many uses for toast. Obviously you can put it on toast, but I had never considered that before (but maybe I will now). And for me, I felt super American because it never occurred to me that a person wouldn’t know how to use fluff. Also, a spoon seems like a perfectly legit means of eating fluff. And why should a treat be healthy? Smores are an amazing American treat and great when turned into a cake.
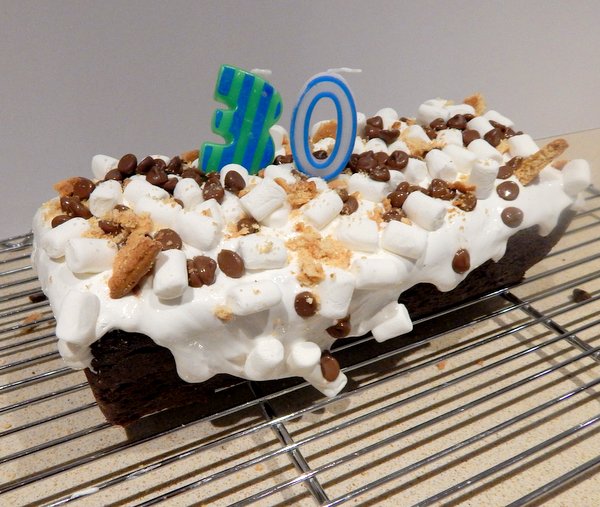
For Ryan’s birthday I made Ryan a steak and mashed potato dinner and then we followed it up with this cake. In making the cake, I did almost set off the smoke alarm. Here’s what happened: I tried to toast the mini marshmallows using the broiler. I put them in the oven and then after about a minute I looked at them and they weren’t even brown yet so I put them back in. I went to melt the marshmallow fluff and checked back in the oven. The marshmallows were puffed up, dark brown, and starting to smoke. I pulled them out, we fanned the smoke, and then threw them out. Oops. Accidents happen.
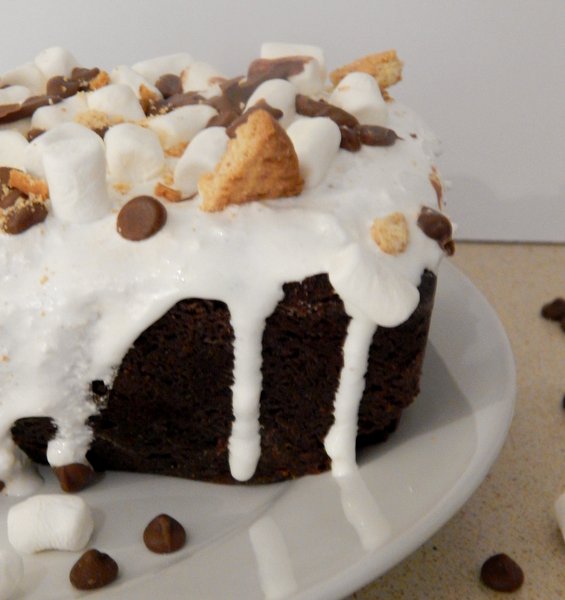
I had more marshmallows, I didn’t toast them, and the cake cake out really nicely. I lit candles, I sang, he made a wish, then we ate cake. And then we finished the whole cake in three days, because that’s how good smores flavors are. The chocolate cake is very dark and rich, so it’s nice as a loaf because you can indulge without having a huge slice. And the top is all smores with fluff, mini marshmallows, chocolate chips, and graham crackers (or in this case digestive biscuits). This cake ticks all the boxes for indulgent dessert because it’s rich, gooey, crunchy, chocolaty, and very sweet.
The cake recipe comes from Smitten Kitchen and the idea for the smores part comes from Kraft.
Messy level: This cake is pretty easy to put together, the messy part comes from the decoration. Marshmallow fluff is sticky and gets everywhere, so that’s the messiest bit.
- ½ cup unsalted butter, softened
- 1 cup firmly packed light brown sugar
- ½ cup granulated sugar
- 1 large egg, at room temperature
- 1 cup buttermilk
- 1 teaspoon vanilla extract
- 1½ cups all-purpose flour
- ¾ cup cocoa powder
- ¼ teaspoon baking soda
- ¼ teaspoon salt
- ¾ of a tub (8oz) marshmallow fluff
- 1 cup mini marshmallows
- 1 cup chocolate chips
- about 4 digestive biscuits (or 2-3 sheets of graham crackers)
- Preheat the oven to 325/165°.
- Butter and lightly flour a 9x5x3-inch loaf pan.
- In a large bowl, cream the butter until smooth.
- Add the sugars to the butter and beat until fluffy. This takes about 3 minutes.
- Add the egg and beat well.
- Then mix in the buttermilk and vanilla.
- In a medium bowl mix together the flour, cocoa, baking soda, and salt together.
- Slowly add the flour into the wet ingredients. Stir together with a spoon until well-blended but do not over mix.
- Pour the batter into the prepared loaf pan. Bake for 60 to 70 minutes, or until a cake tester inserted into the center of the loaf comes out clean.
- Remove from oven and let cool for 10 minutes.
- Remove the cake from its pan. Use the back of a wooden spoon and poke a few holes gently in the top of the cake.
- Put the marshmallow fluff in a bowl and heat in the microwave for about 30 seconds.
- Remove the marshmallow fluff from the microwave and spread over the top of cake. Make sure you fill in the holes so the marshmallow drips into the center of the cake. Use the tip of the knife to encourage some of the fluff to drip tantalizingly down the side.
- Sprinkle the top of the cake with the mini marshmallows and chocolate chips.
- Use your hands to crush up the biscuits/graham crackers. Crush them into some small crumbs and larger cookie shards. Sprinkle/arrange the cookies over the top of the cake. It should look a little messy but indulgent and amazing.
The post Chocolate Smores Cake appeared first on Cooking is Messy.
]]>The post Popeye Muffins appeared first on Cooking is Messy.
]]> I have three things to say about these crazy delicious green muffins.
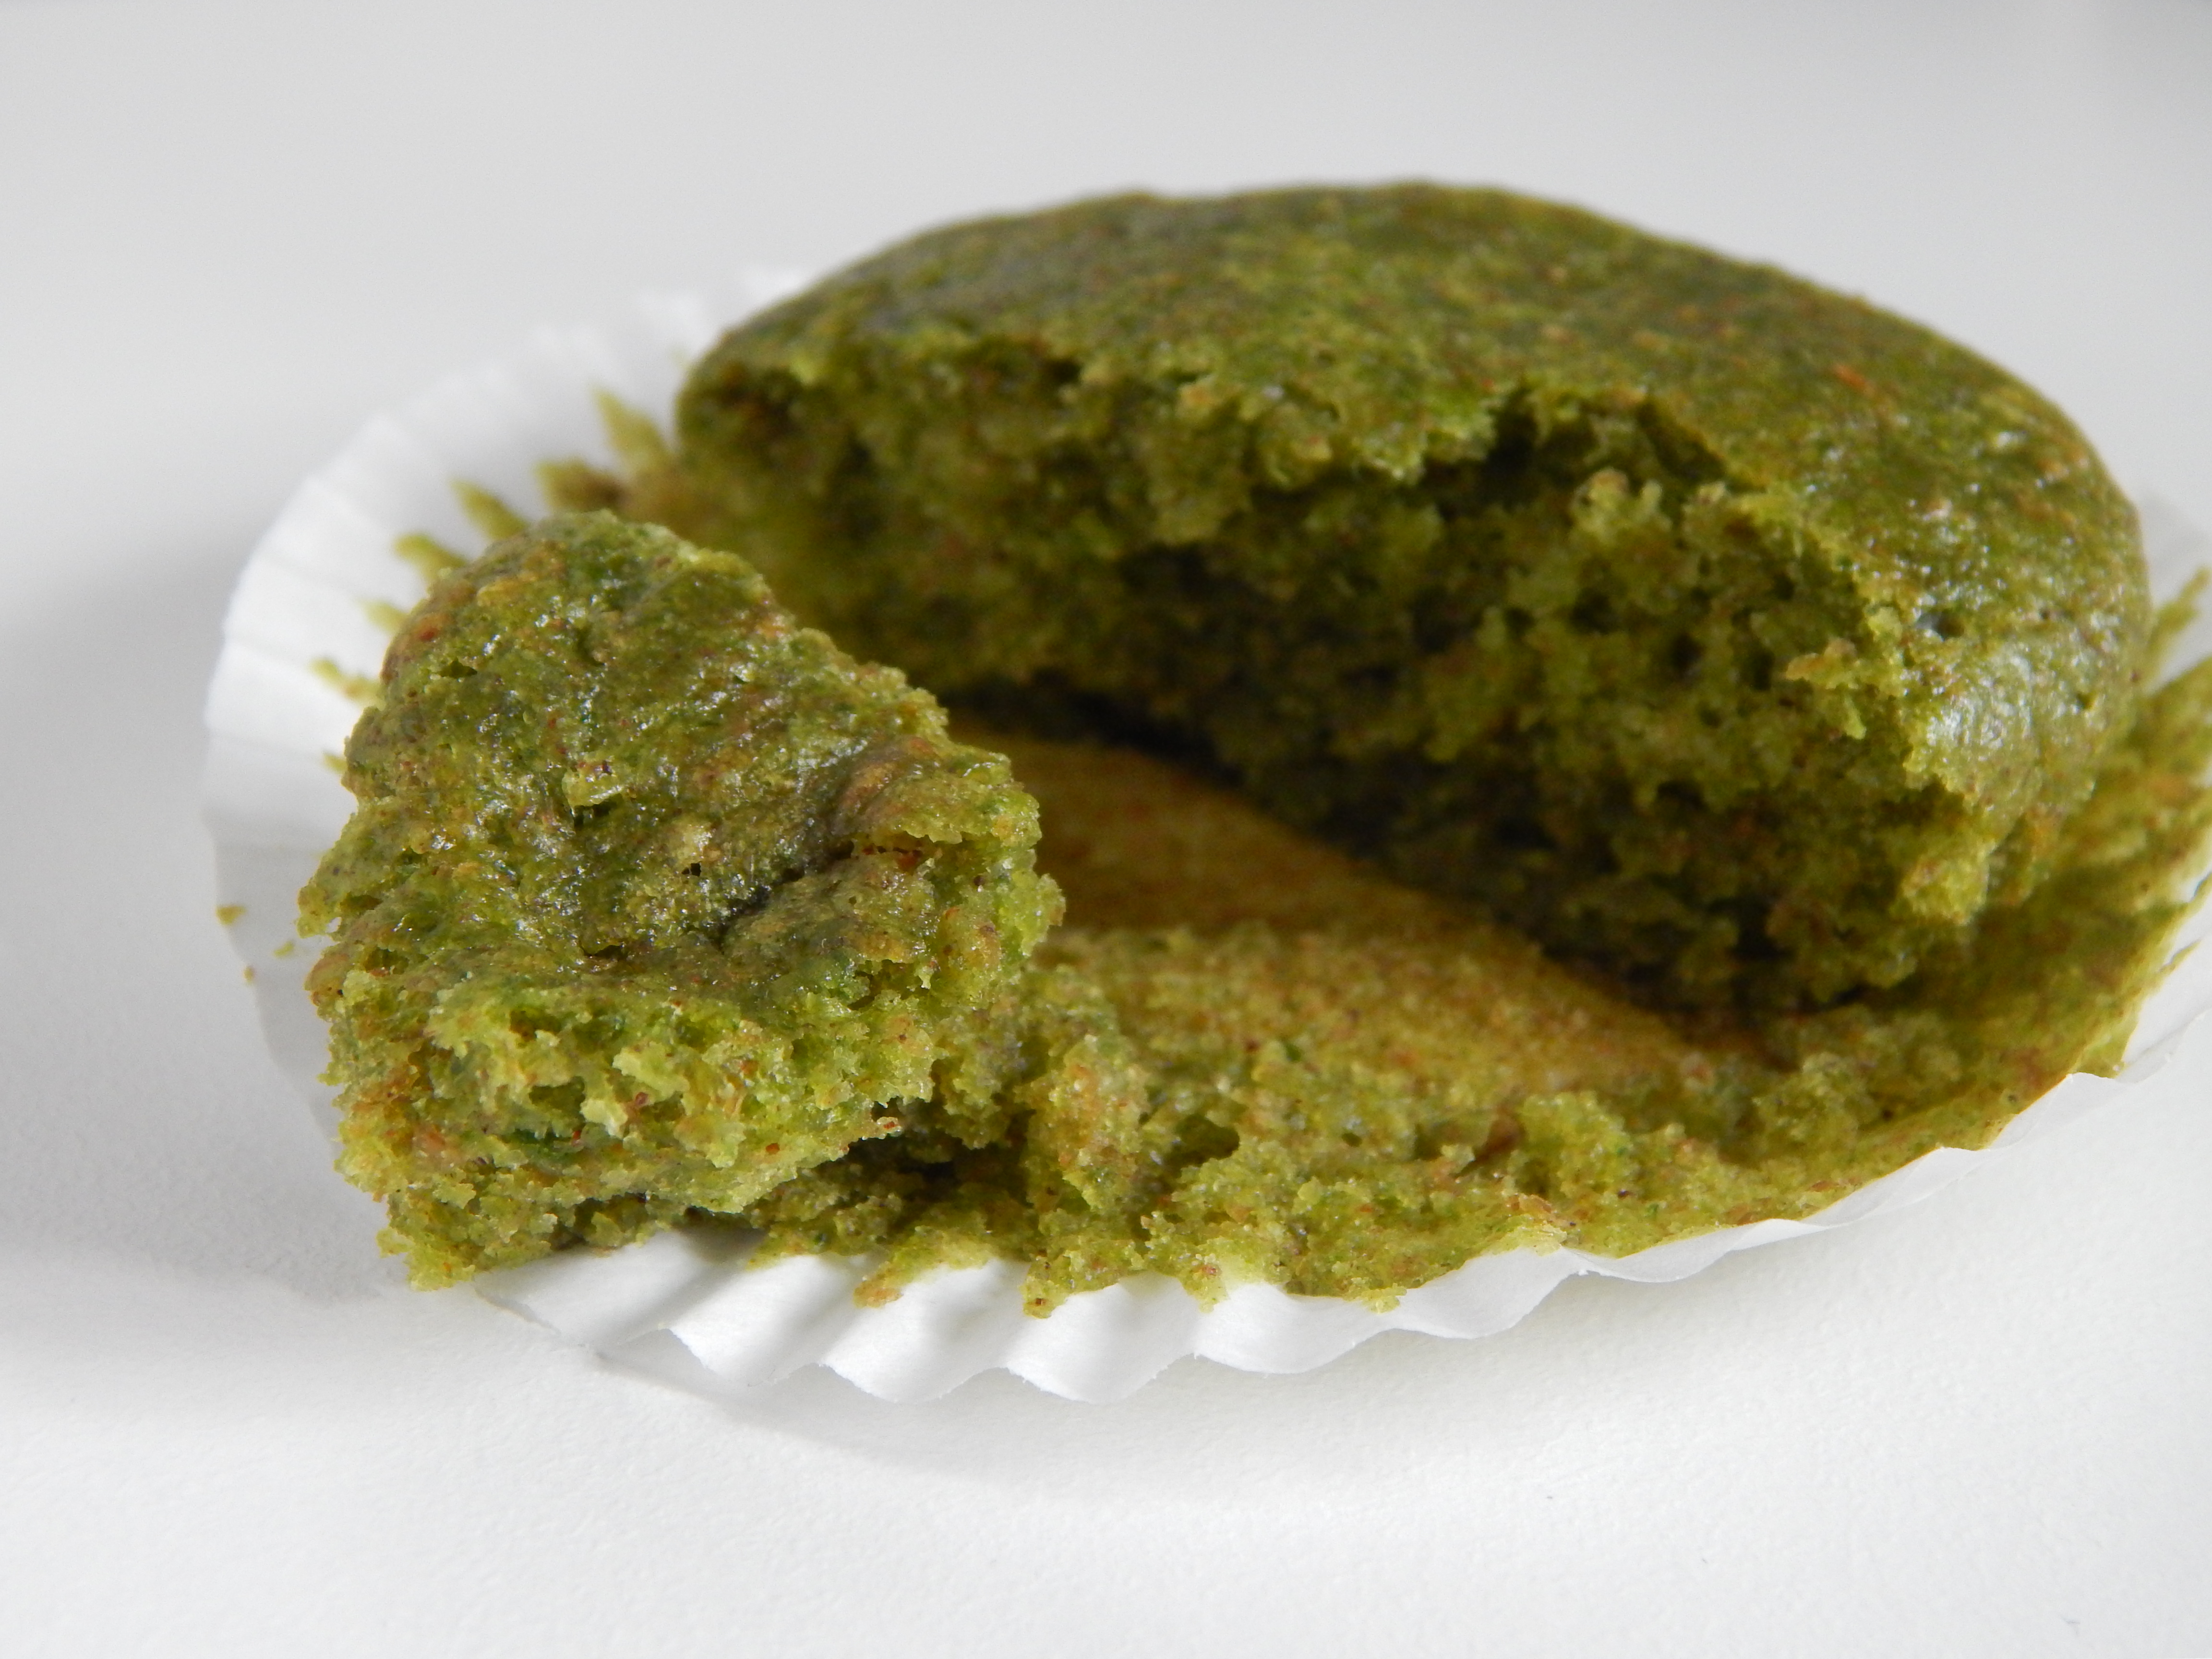
First, if there is a way I can put more vegetables in my food, I will do it. I know people who are anti-hiding vegetable – but not me. I’m always trying to find a way to get more veggies in my diet. I like green smoothies and the zucchini chocolate chip cookies from Animal, Vegetable, Miracle, and I like today’s muffins. When I saw a picture called “spinach Popeye muffins” on Pinterest, I knew it was something I had to try. I mean, make me strong like Popeye and they taste good? Yes please. Try not to be put off by the green muffins. They are fun looking and taste like banana bread.
Second, this is the first baking recipe I have ever significantly altered! When I read the original recipe, I wanted to decrease the sugar and make it a bit healthier. But, I wasn’t really sure how to do it because I know baking is a science and messing it can lead to bad results. Then I read this article from the Harvard School of Public Health and decided, “what the heck, let’s try it.” So I decreased the  sugar by a 1/3, I substituted some brown sugar for the white, and I used low-fat yogurt instead of whole milk. I had no idea how it was going to come out. Luckily it came out SO TASTY!!! The muffins don’t really rise though and the muffin is a bit sticky in texture – both of which I think are a result of my meddling. Still they tasted amazing and I’m sure with a little more meddling, I could fix those issues. But in summation, Ryan and I ate 7 about as soon as they came out of the oven.
Which leads me to my third and final point. While I was baking I was video chatting with my family and I showed them these muffins. There were skeptical and asked Ryan and I to eat one on camera. Anyway, we told them the muffins were sweet and tasted like banana bread. And the best part is they promised if I posted the recipe they would try it. So, here it is guys.
If you’re off put by green spinach-banana muffins, I’ll post a regular banana bread recipe next week.
Adapted from The Green Forks.
Ingredients:
1 cup all-purpose flour
1 cup whole-wheat flour
1/2 cup granulated sugar
1/2 cup brown sugar
2 tsp baking powder
1/2 tsp baking soda
1 1/2 tsp ground cinnamon
1/2 tsp salt
1/4 cup canola oil
3/4 non-fat Greek yogurt
1 6oz bag of baby spinach
2-3 mashed ripe bananas
2 tsp pure vanilla extract
Ingredients:
1. Preheat oven to 350° and line the muffin pan with paper liners.
2. Whisk together the flours, sugars, baking powder, baking soda, cinnamon and salt in a large bowl.
3. Place the oil, yogurt, and spinach in a blender. Blend on high until pureed. You might have to do this in batched (I did because my blender is weak).
4. Add the banana and vanilla to the blender and blend until just mixed.

5. Pour pureed mixture into the dry ingredients. Fold together with a rubber spatula until combined.
6. Fill muffin cups about 3/4 full and bake for 18-20 minutes, or until toothpick poked in the center comes out clean.

7. Let cool (if you can wait!)

8. Try it!!

![]() Messy level: This recipe is a three spoon recipe, although if you have a nice blender maybe fewer spoons. I tried to put all the spinach, yogurt, and oil in the blender at once and all I was doing was overheating the blender. I then took it out and did things in batches, which meant using another bowl. And of course it’s me, so I got green drops of batter all over the counter. Overall, not too messy, just gotta be careful.
Messy level: This recipe is a three spoon recipe, although if you have a nice blender maybe fewer spoons. I tried to put all the spinach, yogurt, and oil in the blender at once and all I was doing was overheating the blender. I then took it out and did things in batches, which meant using another bowl. And of course it’s me, so I got green drops of batter all over the counter. Overall, not too messy, just gotta be careful.
The post Popeye Muffins appeared first on Cooking is Messy.
]]>The post Banoffee Pie appeared first on Cooking is Messy.
]]>
Photo from Bullycomics
Have you ever seen Love Actually? I have. Many times.
Do you know that scene when Juliet (Kiera Knightley) goes to Mark’s (Andrew Lincoln) apartment? She goes there looking to see if he has good video footage of her wedding. When Mark opens the door, she offers him banoffee pie. “What the heck is that?” I’ve thought to myself. So I googled it, and I immediately wanted to have some. And simple as that, I decided to make this pie for myself.
Banoffee pie is banana and toffee pie. Get it? Banana+toffee=banoffe. Doesn’t that sound delicious!?! I really liked this pie. The texture is creamy and silky. It’s cool, delicious, and both indulgent and refreshing.
Also, the technique for this recipe is simple to handle – but what makes this awesome is the transformation some of the ingredients go through. That might sound stupid because all cooking is about transformation. But, I was really blown away how simple things can change. With some heavy beating, cream transforms from a liquid to a semi-solid. I knew whipped cream was cream that was whipped, but I had never made it myself before. But the best transformation was the condensed milk! With heat, it becomes something completely different. It becomes toffee! Look at the pictures below and be impressed.
This recipe is a mix from Nigella Lawson, Brooklyn Limestone, and a graham cracker crust recipe I’ve used before.
Ingredients:
Crust-
1 1/2 cups graham cracker crumbs (about 10 full cracker strips)
3 tbsp sugar
4 tbsp unsalted butter (plus more if needed)
Filing-
3 large bananas
1 14oz can of condensed milk
2 cups whipped cream
1 tsp vanilla extract
1/2 tbsp brown sugar
chocolate shavings (or chocolate bar)
Directions:
1. Remove the label from the can of condensed milk. Place the can in a large pot, cover with water, and bring to a boil. Boil for 2-2.5 hours. Make sure that the can is submerged for the entire time! If you let the water level drop your can will explode and your kitchen will be a scary mess.
2. Once the allotted time has passed, take the pot off the stove. Let the can cool. You’ve just made toffee. How easy, yet impressive, is that?!
2. Preheat oven to 350°.
3. In a food processor, blend the graham crackers until you have fine crumbs.
4. In a medium bowl mix the graham crackers and sugar.
5. Melt the butter in the microwave, then add it to the graham cracker and sugar. Mix until the graham cracker crumbs are all moistened. You want a consistency of slightly wet sand – sand that’s been wet but is drying out. If you need to, you can add more than 4 tbsp of butter.
6. Press the graham cracker crust into your pie plate – bottom, sides and edges. If you want a thick crust use all the mix. I used about 3/4 of the mixture. If you’re not using all of it, set the remainder aside in case you need to do any patchwork later.
7. Put the crust in the oven and bake until it just begins to brown, about 8 minutes.

8. Cut the bananas in slices and layer them on the bottom of the crust.

9. Open the can of toffee. Use a knife to stir the toffee until it is smooth.

10. Pour the toffee over the bananas. If need be, use the knife to smooth any uneven spots.

11. Using an electric mixer beat the whipped cream, vanilla extract, and brown sugar. Beat until the texture is thick and whipped.

12. Spread the whipped cream on top of the toffee. Sprinkle chocolate shavings over the top.

13. Put in the fridge and let set for 2 hours.
14. Slice and serve!

![]() Messy level: For a pie, this is actually a really easy and low-mess recipe. The only part that is messy is the graham cracker crust because crumbs get everywhere during assembly. Everything else is really straightforward and there is so little baking to make such a great pie.
Messy level: For a pie, this is actually a really easy and low-mess recipe. The only part that is messy is the graham cracker crust because crumbs get everywhere during assembly. Everything else is really straightforward and there is so little baking to make such a great pie.
The post Banoffee Pie appeared first on Cooking is Messy.
]]>The post Confetti Cookies appeared first on Cooking is Messy.
]]> I feel a little guilty that it’s been over a week since I’ve posted, but the truth is I haven’t been cooking much. Since I’ve been back I’ve gone out, I’ve had pb&j, grilled cheese, and teriyaki chickpeas. Ryan, on the other hand, has been killing it. He sent me beautiful pictures of the ingredients for pasta, homemade tomato sauce, and cheesy garlic bread. Cheesy garlic bread! I wanted it. It looked gooey and buttery and amazing. Also, he is having great adventures. He recently went to Greenwich and saw the Naval Museum and Royal Observatory. The pictures are impressive – check them out below. Gorgeous architecture, amazing painted ceilings, and beautiful scenery!

Meanwhile, back here in Virginia, the one thing I have made were these cookies. The recipe comes from the Momofuku Milk Bar cookbook and was recommended to me by my aunt. These cookies are colorful and festive and I made them for my friend to celebrate that she got a new job. I had been wanting to make these, but it’s taken awhile because the recipe is a bit labor intensive and requires some obscure ingredients. For real, I had to order some ingredients online. This cookie is a labor of love. But, sugary sweet, happy, and worth it.
They are a bit like snicker doodles,which the author, Christina Tosi, says is because of the cream of tartar. In the book, Tosi also wrote that she wanted to create boxed Funfetti cake in a cookie. And I think she nailed it. The cookie is so sweet, indulgent, and so cheerful. Yes, I did just say a cookie could be cheerful. I love the colorful sprinkles – it makes them the perfect celebration cookie.
As I said this recipe is from the Momofuku Milk Bar cookbook. This recipe requires a two step process – first you make “crumb” and then you make the cookie dough. Neither step is super challenging, but I thought you should be forewarned. If you get intimidated, just remember how wonderful and pretty sprinkles are and then you’ll be able to keep going.
Ingredients
Crumb:
1/4 cup granulated sugar
3/4 tbsp brown sugar
3/8 cup cake flour (45 grams)
1/4 tsp baking powder
1/4 tsp kosher salt
1 tbsp rainbow sprinkles
1/8 cup grapeseed oil
1/2 tbsp Clear Vanilla Extract (clear or imitation extract is apparently important, makes it taste more like box Funfetti cake)
Cookie Dough:
16 tbsp butter, at room temperature
1 1/2 cups sugar
2 tbsp glucose
2 eggs
2 tsp clear vanilla extract
2 1/2 cups of flour
2/3 cup milk powder
2 tsp cream of tartar
1 tsp baking soda
1 1/4 tsp kosher salt
1/4 rainbow sprinkles
cake crumb recipe
Directions:
1. First we’re making the crumb. Preheat the oven to 300°.
2. Using a stand mixer with a paddle attachment on low speed, mix together the sugars, flour, baking powder, salt, and sprinkles.

3. Add the oil and vanilla. Mix again until evenly mixed and small clusters start to form.

4. Line a cookie sheet with parchment paper. Pour the clusters onto the parchment paper. Bake for 15-20 minutes. Break them up occasionally as they cook. The crumbs should still be a bit moist when you take them out of the oven – they will dry out as they cool.
5. Let them cool completely before using them in the cookie dough. (I waited 1 hour)

6. Take the butter out of the fridge. You can let it come to room temperature while you wait for the crumb to cool.
7. Ok, now start on the cookies. In the stand mixer (which you’ve cleaned out from before), combine the butter, sugar, and glucose. Beat on medium-high for 2 minutes.
8. Scrape down the sides of the bowl. Add the eggs and vanilla and beat for 7-8 minutes. (Tosi says this is the key to her cookies being great – the butter is so fluffy and creamy this way).

9. Reduce the mixer speed to low. Add the flour, milk powder, cream of tartar, baking soda, salt, and rainbow sprinkles. Mix until the dough just comes together, no more than 1 minute. You do not want to over mix.
10. Add the crumbs and mix in for 30 seconds.
11. Line a cookie sheet with parchment. Portion out the dough into large-ish balls (about 2-3 tbsp). Flatten the tops a bit with your fingers. Cover tightly with plastic wrap.

12. Put the cookies in the fridge for 1 hour, or up to 1 week.
13. When you’re ready to bake, heat the oven to 350°.
14. Arrange the cookies about 3 inches apart on a cookie sheet lined with parchment paper.
15. Bake for 13-18 minutes. They are ready when the edges start to be gold and the center of the cookie is starting to get color. They will seem soft, but they harden as you let them cool.

16. Let cool before serving. Then share them with friends and feel happy!
![]() Messy level: 3 spoons. To make this cookie, you are basically making two recipes and that means a lot of dishes and a lot of chances for flour to fly. Glucose is really sticky and messy, eggs are drippy, and butter is greasy. It’s not the worst mess you’ll ever make but there’s potential. Give yourself time and try to be organized and it won’t be so messy!
Messy level: 3 spoons. To make this cookie, you are basically making two recipes and that means a lot of dishes and a lot of chances for flour to fly. Glucose is really sticky and messy, eggs are drippy, and butter is greasy. It’s not the worst mess you’ll ever make but there’s potential. Give yourself time and try to be organized and it won’t be so messy!
The post Confetti Cookies appeared first on Cooking is Messy.
]]>The post Chocolate Chip Cookies appeared first on Cooking is Messy.
]]> Sometimes a person needs a cookie. And after this weekend, I really needed one. Ryan and I went on a long road trip, we went to a wedding, I cried over missing our friends, I took Ryan to the airport, I watched scary TV, and I got pumped and started packing for London. See? I needed a cookie. Let me tell you about it.
This weekend Ryan was in his friend Tommy’s wedding in Atlanta. We left on Thursday and stayed overnight with our friends who live in North Carolina. They just moved into a beautiful new house with the most amazing kitchen. (To digress a bit, their kitchen is truly a dream kitchen with a huge fridge, two ovens, and a beautiful gigantic island. I wish I had taken pictures). Anyway, it was wonderful to see them, their new home, and to catch up. We parted and I was so sad to leave them. I asked Ryan if when we come back if we could be their neighbors (and so I could have an awesome kitchen too).

Ryan and his oldest friends. The groom is second from the right.
Then we drove on to Atlanta for the wedding and spent the weekend with Ryan’s childhood friends and their girlfriends. It was such a blast hanging out, overdosing on sugary soda at the World of Coke, dancing, and spending time together. They are like family, we spend a week with them every summer at the beach, and it doesn’t matter if we do nothing or something we always have a good time. And again Ryan and I thought, “why don’t we live closer to them? Let’s be their neighbors.” Sigh. All the people we are going to miss when we move.
So Saturday night after the wedding, I went to bed a bit weepy thinking, “tomorrow is the day things change.” Ryan and I drove straight back to Virginia (10 surprisingly non-painful hours), hung out in the apartment for a bit, and then I drove him to the airport. After such a long travel weekend, Ryan flew to London. He probably needed a cookie himself.
I drove home sad and feeling bad that I wasn’t going with him yet. Then I watched Walking Dead by myself and after that normal apartment noises started to sound scary. I was feeling tired from the travel, blue about moving away from friends, and stressed about all the packing and prep still to be done.

Me and Ryan in bubbles at the World of Coke
But then I woke up this morning with a snow day, which eased my stress because I had time to clean and pack. The best part though was that I got to talk to Ryan. He looked really happy and in good spirits. He showed me around our flat (tiny but very cute). And it all became real – in a great way. The adventure has begun!! It’s real, exciting, wonderful and I had tons of energy to start packing. I know the nerves and worries will come back, but I’m super excited for my flight in a few days.
So you see, cookies were a must. These cookies are really delicious. I adapted this recipe from the one on the back of the Tollhouse chocolate chip bag. I love these cookies because they are the right amount of chewy and firm. In the oven, the cookies spread a bit but still hold a little height which I think makes for a great bite. They are sweet, tasty, and addicting. So what’s going on in your life? Try to find a way to work some cookies into your day.
Ingredients
3/4 cup whole wheat flour
1 1/2 cup all-purpose flour
1 tsp baking soda
1 tsp kosher salt (I did not use table salt)
1 cup of butter (softened)
3/4 cup granulated sugar
3/4 brown sugar (I used light)
1 tsp vanilla extract
2 large eggs
1 12oz package of chocolate chips
Directions:
1. 20-30 minutes before you want to get baking, take the butter out of the fridge and leave it on your counter. Come back to it in 20-30 minutes.
2. Preheat the oven to 375°.
3. In a medium bowl, mix the flour, baking soda, and salt.
4. Using an electric mixer, beat the butter, granulated sugar, and brown sugar for 2 minutes on medium speed. This is going to make the butter really light and fluffy like whipped cream. You might think this is a long time, but I really like what the fluffy butter does to the cookies.

4. Add in the vanilla and mix until incorporated.
5. Add the eggs, one at a time. Don’t add the second one in, until the first is already mixed in. Beat until both are well mixed.
6. Gradually pour the flour mixture into the butter/egg/sugar mixture. I did this in four batches. Pour a bit, mix until that bit is 70% incorporated, then repeat.
7. Mix in the chocolate chips.
8. Make balls of dough that are about 1.5-2 tablespoon in size. Drop on a cookie sheet and flatten the top just a bit.

9. Bake for 8-10 minutes (I did 8 minutes). You want the cookies to be golden and just a bit brown. Look how many cookies this recipe makes! It’s almost 4 dozen.

10. Dip in milk and be really happy.

![]() Messy Level: One spoon. Cookies are so easy because you only need two bowls and one cookie sheet.
Messy Level: One spoon. Cookies are so easy because you only need two bowls and one cookie sheet.
The post Chocolate Chip Cookies appeared first on Cooking is Messy.
]]>